


Ender 3 Sries 3D printer (Ender3 V3 KE)
Product ID: 603567480
Details
- BrandCreality
- MaterialBuild Surface:
- ColourBlack
- Product dimensions43.3D x 36.6W
- Item weight7.8 Kilograms
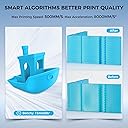
⚡500mm/s max speed
🔥300℃ high-temp hotend
🖥️4.3" smart touch UI
🚀 Print at the speed of innovation—Ender-3 V3 KE takes your creativity to warp speed!
The Creality Ender-3 V3 KE is a professional-grade 3D printer boasting a max speed of 500mm/s, a high-temp 300℃ hotend with a 60W ceramic heater, and a 25-point CR Touch auto-leveling system. Its 4.3" color touch screen UI, smart remote control via WiFi and cloud, and robust steel linear rails ensure precision, versatility, and seamless user experience for advanced makers and prosumers alike.


| Brand | Creality |
| Colour | Black |
| Operating system | Windows, macOS, Linux |
| Power consumption | 60 Watts |
| Product dimensions | 30D x 20W x 30H centimetres |
| Supported file format | OBJ |
P**G
Really good printer
Do not leave printer overnight and use Bed glue, the print failed and stuck to the printer, forcing filament up into the nozzle and fans, the fans got stuck, and it nearly caught fire. It started smoking really bad. I came down to a room full of smoke. The printer had actually caught fire overnight at your own risk.
C**W
Impressed second printer and easy to use.
Only issues was some screws needed tightening. Some people getting het up about bed not being level. Does need to be comes with auto bed setting /clibration and compensates accordingly. Assembly in 20minutes.
G**E
3d
Great product my lad loves it
A**R
Set on fire
Set on fire went through creality support took ages to resolve anything and the return window closed before I could return it don't buy this
B**E
Fast and good quality printing
I have a few 3d printer and I think this is one of the better ones. Self levelling is easy to use, a print that takes 10 hours on one printer takes about 6 on this one but you have to be careful of the smaller prints and change speed.
R**Y
It WAS okay for a while...
It WAS okay. From out of the box the printer head made a squealing noise that was just a bit annoying. Over the months the noise became louder and louder. It now 'screams' at times. I contacted Creality and all they did was send me a link to BUY a replacement head - no offer of a repair of courtesy replacement, which is a shame. The printer was bought in April so it is still well withing it's warranty.
Trustpilot
3 weeks ago
1 month ago