JANSANE 16x2 1602 LCD Display Screen Blue + IIC I2C Module Interface Adapter for Raspberry pi 2 Pack
Thumbnail 1Thumbnail 2Thumbnail 3Thumbnail 4Thumbnail 5Thumbnail 6

JANSANE 16x2 1602 LCD Display Screen Blue + IIC I2C Module Interface Adapter for Raspberry pi 2 Pack

Product ID: 70235853
Secure Transaction

Details

  • Brand
    BAKAH
  • Operating System
    Linux
  • CPU Model
    Intel Core
  • Graphics Card Description
    Dedicated
  • Personal computer design type
    Mini PC
  • Included Components
    2 x 16x2 1602
5V operating voltage, low power
🔗I2C serial interface for easy wiring
🔵Blue backlit 16x2 display

Description

🔵 Illuminate your projects with clarity and ease — the ultimate 16x2 LCD duo for pros!

  • UNIVERSAL COMPATIBILITY - Designed to work flawlessly with Raspberry Pi and Arduino, perfect for displaying real-time data like clocks, temperature, and humidity.
  • PLUG PLAY I 2 C INTERFACE - Simplify your wiring with the I2C serial interface adapter—just 4 pins (VCC, GND, SDA, SCL) for seamless Raspberry Pi or Arduino integration.
  • RELIABLE READY FOR MAKERS - Backed by a 12-month warranty and satisfaction guarantee, this 2-pack ensures you never run out of display power for your next big idea.
  • CRYSTAL CLEAR BLUE BACKLIGHT - Experience sharp, easy-to-read 2 lines x 16 characters display with vibrant blue backlight that stands out in any project setup.
  • CUSTOMIZABLE CONTRAST BRIGHTNESS - Fine-tune your display visibility with an adjustable potentiometer and backlight header for optimal viewing in any lighting condition.

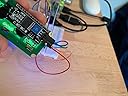
The JANSANE 16x2 1602 LCD Display Screen with I2C Module is a dual-pack blue backlit LCD designed for Raspberry Pi and Arduino users. Featuring a 2-line by 16-character display controlled by the HD44780 chipset, it offers easy I2C serial communication with just four pins, adjustable contrast, and a 5V operating voltage. Ideal for real-time data display like clocks and sensors, it comes with a 12-month warranty and satisfaction guarantee, making it a reliable choice for professional makers and developers.

Specifications

Max Screen Resolution1920x1080
Processorintel_core_i7_11700K
RAM1
Hard DriveSSD
Card DescriptionDedicated
BrandBAKAH
Operating SystemLinux
Item Weight0.81 ounces
Product Dimensions2.8 x 1.9 x 1 inches
Item Dimensions LxWxH2.8 x 1.9 x 1 inches
Processor BrandVIA
Number of Processors1
Computer Memory TypeDDR4 SDRAM
Hard Drive InterfaceSerial ATA

Have a Question? See What Others Asked

Is the LCD and i2c pre-soldered?
What library should you use for python on a Raspberry Pi and where can we download said library?
Will this work with the arduino?
What are this display's physical dimensions?

Reviews

M**R

Make sure you adjust the small potentiometer in the back until you start to see the number segments

At first I thought these were defective until somewhere on a YouTube sight I heard that the potentiometer in the back-side of the CCA needs to be adjusted for contrast. After I did that, the display came alive. It is nice and bright and works well on its I2C interface.

G**N

Excellent Value, No Directions

These LCDs are an excellent value, and both of mine worked perfectly, but they come with no directions. Thanks to the 8574 interface board on the back, you only need 4 connections to an Arduino Uno board, one 5V, one GND, A4 to SDA and A5 to SDL. You’ll also need a zip file with the library for the Liquid Crystal PFC8574 interface. One other thing that should be mentioned is that you need to connect a 2-pin jumper at the pins marked LED on the 8574 board. Two of these jumpers come in the package with the 2 LCDs, but they are not installed – be careful opening the package, because they are tiny and easily lost if they fall out.

V**Y

Good value, quality could be better

These work well and are as described. Contrast had to be adjusted via the trimpot at the back. The backlight is bright. There doesn't seem to be any way to control brightness in software, can just turn it on or off. The backlight is required though. Nothing is visible without it. Both units worked fine. Quality could have been better with a little attention to how these are assembled. Looks like they were put together in a hurry.

I**E

Most important to adjust pot on back board to see display(contrast) and test with LCD Uno sketch

This is a good product but i returned two of them . The first one was due to not seeing display.The second because they sent it without the serial piggyback board that makes it a 4 wire display.Advice:Load your library in Arduino for Arduino I2C Serial LCDGo to FILE ....EXAMPLES....Arduino I2C Serial LCD or whatever library is and load HELLO WORLD or other exampleTest it out. If you get no display alter the line that changes the address so it sees the device.0x27 (Zero X Two Seven) is most common for sunfounder devices. There is a test program to find your lcd addressyou load the test then you go to serial monitor while the arduino uno with the lcd is connected and it will tell you the address of the display. Then you change the code to the right address.Think of it like this the mail man delivers the mail to the wrong house because you have the wrong address and wonder why you aren't getting your mail;Here is sketch for lcd test#include <Wire.h>#include <LiquidCrystal_I2C.h>LiquidCrystal_I2C lcd(0x27,20,4); // set the LCD address to 0x27 for a 16 chars and 2 line displayvoid setup(){lcd.init(); // initialize the lcdlcd.init();// Print a message to the LCD.lcd.backlight();lcd.setCursor(1,0);lcd.print("hello everyone");lcd.setCursor(1,1);lcd.print("konichiwaa");}void loop(){}To test your display compile this code then send to your uno or nano (etc)your code in Arduino IDE Software, save it. Select the port (i.e COM3) and choose your Arduino board type (i.e Arduino Uno / Genuino) then compile it to your Arduino./ ---------------------------------------------------------------- /// Arduino I2C Scanner// Re-writed by Arbi Abdul Jabbaar// Using Arduino IDE 1.8.7// Using GY-87 module for the target// Tested on 10 September 2019// This sketch tests the standard 7-bit addresses// Devices with higher bit address might not be seen properly./ ---------------------------------------------------------------- /#include <Wire.h> //include Wire.h libraryvoid setup(){Wire.begin(); // Wire communication beginSerial.begin(9600); // The baudrate of Serial monitor is set in 9600while (!Serial); // Waiting for Serial MonitorSerial.println("\nI2C Scanner");}void loop(){byte error, address; //variable for error and I2C addressint nDevices;Serial.println("Scanning...");nDevices = 0;for (address = 1; address < 127; address++ ){// The i2c_scanner uses the return value of// the Write.endTransmisstion to see if// a device did acknowledge to the address.Wire.beginTransmission(address);error = Wire.endTransmission();if (error == 0){Serial.print("I2C device found at address 0x");if (address < 16)Serial.print("0");Serial.print(address, HEX);Serial.println(" !");nDevices++;}else if (error == 4){Serial.print("Unknown error at address 0x");if (address < 16)Serial.print("0");Serial.println(address, HEX);}}if (nDevices == 0)Serial.println("No I2C devices found\n");elseSerial.println("done\n");delay(5000); // wait 5 seconds for the next I2C scan}Then run serial monitor and copy down the address

C**K

Easy to get going

No documentation, but it's a 1602 with the PCF8574 chip on the backpack. This is a really commonly used setup and there are plenty of libraries for it. Other than power, just 2 wires are needed to get it setup for I2C. My address was 27 and had the yellow tape on the USB port.If your screen is blank or not working but the LED light is on, make sure you adjust the contrast (both of mine came adjusted all the way down). This is done by adjusting the potentiometer, which is a blue box on the back of the LCD with a screw in it. Use a screw driver to slowly turn the screw until you can see the individual numbers/letters.

L**.

Pinout

For those not using Arduino libraries on AVR devices. It must be initialized into 4-bit mode & the pin out is..D7 D6 D5 D4 BL EN RW RS -- Check the datasheet for HD44780U on how to do thisYou must send high bits first with enable pulse then send the low bits with enable pulseIf I had known this earlier I could have finished writing my own LCD i2c drivers much sooner(2weeks) but alas I've figured it out and can start looking at my next learning project.Great product, works; I think the complaints of damaged shipment is not entirely the fault of seller. Sometimes people don't care what's in the boxes they are throwing around at shipping facilities.I had no issues/damaged pins; Only gripe was trying to figure out the which pins were which & I'm lucky most folks use the same pinout when using this LCD controller & GPIO expander so I found the pinout in someone's STM32 project(I'm using 8bit AVR controllers).Edit: BL is Backlight; The list is all the pins you need for operationHigh bits => D7-D4Backlight => BLEN(or E) => Enable pinRead/Write select => RWRegister select(command or data) => RS

P**E

Work for my RPI project. I did need to download drivers.

If you're purchasing these you probably have some purpose or technical skills when it comes to these types of devices. It's not plug and play and you will most likely need to download the drivers but whatever particular project you're working on. build quality for the price is solid and the price point is just enough that I doubt you're going to really mind if one of them burns out in a month or so although I have experienced no such issues.

Common Questions

Yes, all products are sourced directly from authorized retailers in the US, UK, UAE and India. We maintain strict quality control processes and verify each product before shipping. All items come with applicable manufacturer warranties and are covered by our standard return policy.
Delivery times vary by destination country, typically ranging from 3-9 business days. Each order is fully trackable through our system. We handle all customs clearance and use reliable courier partners for last-mile delivery. You'll receive regular updates about your order status via email and our app.
Desertcart is an international e-commerce platform operating since 2014. We securely process thousands of orders globally each day. Every product goes through our quality verification process before delivery, and we provide end-to-end order tracking, 24/7 customer support, and a comprehensive returns policy to ensure a safe shopping experience.
Our prices include the product cost, international shipping, import duties, customs clearance, and local delivery charges. We handle all customs and import procedures, ensuring there are no hidden fees upon delivery. PRO members receive additional benefits including free shipping.

Trustpilot

TrustScore 4.5 | 7,300+ reviews

Yusuf A.

Fantastic experience overall. Will recommend to friends and family.

1 month ago

Suresh K.

Very impressed with the quality and fast delivery. Will shop here again.

4 days ago

Shop Global, Save with Desertcart
Value for Money
Competitive prices on a vast range of products
Shop Globally
Serving millions of shoppers across more than 100 countries
Enhanced Protection
Trusted payment options loved by worldwide shoppers
Customer Assurance
Trusted payment options loved by worldwide shoppers.
Desertcart App
Shop on the go, anytime, anywhere.
$50315

Duties & taxes incl.

Colombiastore
1
Free Returns

30 daysfor PRO membership users

15 dayswithout membership

Secure Transaction

Ask AI about this Product

Trustpilot

TrustScore 4.5 | 7,300+ reviews

Anjali K.

The product quality is outstanding. Exactly what I needed for my work.

1 month ago

Rajesh P.

Customer service was outstanding when I had questions about the product.

2 days ago

Jansane 16x2 1602 Lcd Display Screen Blue Iic I2c Module | Desertcart Colombia