


Desertcart purchases this item on your behalf and handles shipping, customs, and support to Colombia.
โก Stick with the future of conductive bondingโstrong, smart, and silver-powered!
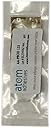
AA-DUCT 906 is a cutting-edge electrically conductive silver epoxy adhesive featuring a silver-coated ceramic formula that delivers high conductivity and strong adhesion across diverse substrates. It cures at room temperature within 24 hours, offers a 1-hour working window, and comes in a precision single-use pouch for optimal mixing. Ideal for electronics repair, EMI/RFI shielding, and complex bonding tasks, this USA-made adhesive meets RoHS and Conflict Mineral standards, combining performance with responsible manufacturing.
| ASIN | B00EPYD1YO |
| Best Sellers Rank | #39,609 in Industrial & Scientific ( See Top 100 in Industrial & Scientific ) #18 in Electrically Conductive Adhesives |
| Brand | Atom Adhesives |
| Brand Name | Atom Adhesives |
| Color | Silver |
| Compatible Material | All Substrates Except Plastics and Rubber |
| Container Type | Can |
| Customer Reviews | 3.7 out of 5 stars 457 Reviews |
| Full Cure Time | 24 hours |
| Item Form | Paste |
| Item Package Quantity | 1 |
| Item Weight | 2.5 g |
| Manufacturer | Atom Adhesives |
| Material | Silver-coated ceramic |
| Material Type | Silver-coated ceramic |
| Model | AA-DUCT-906 |
| Number of Pieces | 1 |
| Other Special Features of the Product | Strong |
| Part Number | AA-DUCT 906-2.5 |
| Special Feature | Strong |
| Specific Uses For Product | Repair |
| Tensile Strength | 3400 kips_per_square_inch |
| Viscosity Level | High |
| Volume | 2.5 ml |
| Water Resistance Level | Water Resistant |
C**E
It worked for me. But......
...... it's only as good as the application. Note: The hardener to resin ratio is NOT 1:1 like most 5 minute epoxies. This is more like 1:20. So that little drop of clear liquid on one side of the pouch is exactly the right size. Therefore proper mixing is EXTREMELY important. Start by rolling up the clear side of the pouch like a tube of toothpaste towards the center. Pretty soon you'll have a bubble of air forced up against the "burst seam". Keep pushing until it bursts the seam. Then start working it over the edge of a table. Slide it over the corner, forcing all of the contents to one side of the pouch. Then slide it the other way, pushing everything to the other side. Repeat 40 times. Yes. 40. It's necessary to get that little drop of hardener thoroughly mixed throughout the resin. Finally, force everything to one end, clip a corner with some scissors and dispense as needed. Don't rush. This isn't 5-Minute Epoxy. You have plenty of working time. Have everything prepped and ready to go because once you start you're committed. I made a difficult and complex repair to an aluminum contact point on a 100ah LifePo4 battery cell. I had broken it off during a drill & tap operation. It was insulated from the battery case on 85% of it's surface but the other 15% extended down into the cell, where it had broken free from a copper post. I mounted the tab back in place with Gorilla Glue but needed a way to provide a solid electrical connection from the tab to the interior copper post. Without shorting out the whole battery. An 8mm socket head cap screw with a 5mm hole bored down through it's center did the trick. I loaded the epoxy into the battery with a syringe (on top of the copper post). I ran the screw down into it (the hole in the middle of the screw prevented hydro-locking and provided additional surface area for mechanical adhesion and conductivity). I tightened everything down and waited 24 hours. The epoxy set up hard as a rock and my volt meter showed excellent voltage with little to no additional internal resistance. Saved a brand new (expensive) battery from the scrap heap. Atom Adhesives makes a whole line of conductive epoxies. Carbon filled, nickel filled, or like this one, silver filled. They're not cheap. But if used correctly they do a great job. They have specialty products for window heater repair so it would be worth searching their website for the proper product for your needs.
L**I
PROBLEMS GALORE
The first thing that upset me was the packaging. Instead of using small tubes (like epoxy) where you can squeeze out SOME of the product, they use plastic pouches which allows you to use the item ONCE, and you have no choice but to discard the rest ($12, down the drain, because you only use about $2-3 worth for the repair). Okay, so the product DID work... for about 6-7 times that I turned the defroster on. BUT NOW it has STOPPED adhering and I'm back to square one.BOY, DO I WISH THEY PACKAGED THIS ADHESIVE IN TWO SEPARATE TUBES SO I'D HAVE SOME MORE TO USE, but I had NO CHOICE and had to discard the rest of the product after mixing it. Therefore, it is NOT WORTH almost $19 for ONE use, and as stated previously, the bond doesn't even last that long! Save yourself the trouble and go with an alternative product.
K**Y
Worked perfectly!
When my rear window defroster connection broke, I thought that I might need a new window. Then I found this electrical epoxy. I had a question about the epoxy and emailed the company late in the evening. I noticed in the package that there was a tiny amount of clear hardener liquid. I wondered if it was enough. I thought that I would get a response the next day, but they responded within 30 minutes! The technician assured me that it had the correct amount of hardener. The instructions noted that the epoxy needs to cure at 60ยฐF or more. Fortunately the rear window is removable on my Bronco. So I was able to bring it inside. I cleaned up the connections with 220 grit sand paper and rubbing alcohol. There was plenty of epoxy to apply and I put some extra around the other connector on the other end of the window. After curing for 24 hours, the epoxy was hard. I reattach everything. It's been 2 weeks and the defroster is working perfectly fine!
P**.
Epoxy will become brittle over time.
I used this paste to repair the window defroster cable that detached from the rear window of my Jeep. The key to using this product is preparation since the potting time is really short so you must prepare the surface correctly. I taped off my Jeep window and left out the area where the cable make the contact. I mixed the epoxy thoroughly as in the instruction and squeezed out onto a cardboard. I used wooden coffee stirrer and applied the epoxy paste on the glass, taped defroster cable to the window and secured for 24 hours with tape. The defroster worked again afterward. My only criticism is the epoxy will get brittle with time. Mine lasted for about just over two years and the cracks in the epoxy created too high resistance for the defroster to work efficiently. I am ordering this product again to repair the cracked epoxy. This is why I only give it four stars.
E**N
Great Money Saving Product
The solder had broken lose on the rear window defroster of my Jeep Wrangler. The jeep dealer wanted $235 to repair it. I checked with my regular mechanic and he was afraid he would damage the window trying to resolder it. Since I wouldn't pay the jeep dealer the unreasonable price I started checking around for other alternatives and found this silver conductive glue and decided to give it a try. Long story short it worked great. BE SURE TO FOLLOW DIRECTIONS THAT COMES WITH THE GLUE!!!! After preparing the glue I applied a small amount on a small piece of cardboard to let it cure some (let it get a little tacky). In the case of my Wrangler there is a small button that can detach from the wire so that made it much easier to glue and hold with the tacky glue. I used a toothpick to apply the glue which prevented any major mess. I didn't have to use any tape as the glue held fine after I pressed it in place with the toothpick for a couple of minutes. If tape is needed to hold in place I would recommend blue tape. Be sure you wait the full 24 hours to let the glue completely cure. I highly recommended this product.
C**E
Didnt last long.
In fact when we went to use it the first time we realized the rear window would not defrost and upon inspection saw the wire hanging again. Left the tab taped in place for 3 days before reattaching the wire.
D**R
Conductive epoxy. Works great.
I accidentally popped the rear defrost wire off the back glass of my car. Used a tube of this as a "cold solder" and it works great. Repair has held up perfectly and restored the functionality of the rear defroster.
J**.
Might be conductive, definitely not low resistivity
I bought this (AA-DUCT 906) to repair a broken (cracked) carbon trace in a volume control (20 Kohm potentiometer). It's a single use product, even at 2.5g it was more product than I needed. The mixing instructions were straight-forward and the 40X-edge-of-the-desk mixing technique was easy. Material was viscous enough to easily apply to a small area and not have it "contaminate" nearby items, really a no mess application. So I had a small crack in the carbon trace in the POT. I used a toothpick to apply a smooth layer of the product across this crack bridging it to the metal tab (which eventually will get re-soldered on to PCB). I left this for 24hrs in a 68F room (suggested time is 24hr @65F for proper cure). In addition to the repair I had a large test sample left over (plan was to use this sample to test the cured product for conductivity in addition to the POT). So end result is I have a solid bond on my POT but it's high resistance...in the Meg Ohm region. Not the solution planned. Was hoping for a low resistance (<10ohm) connection. The test sample seems to be almost insulated on the outside. Only when I roughed up the sample did I get a high MegOhm value reading on my DMM. I used needle tip probes to jab the test sample. So not sure where to go from here, but this product was not the correct solution.
Trustpilot
2 days ago
2 weeks ago