Buy anything from 5,000+ international stores. One checkout price. No surprise fees. Join 2M+ shoppers on Desertcart.
Desertcart purchases this item on your behalf and handles shipping, customs, and support to Colombia.
🔥 Elevate your kitchen game with the pan that seasons like a pro and sears like a boss!
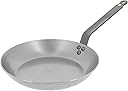
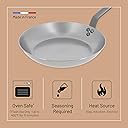
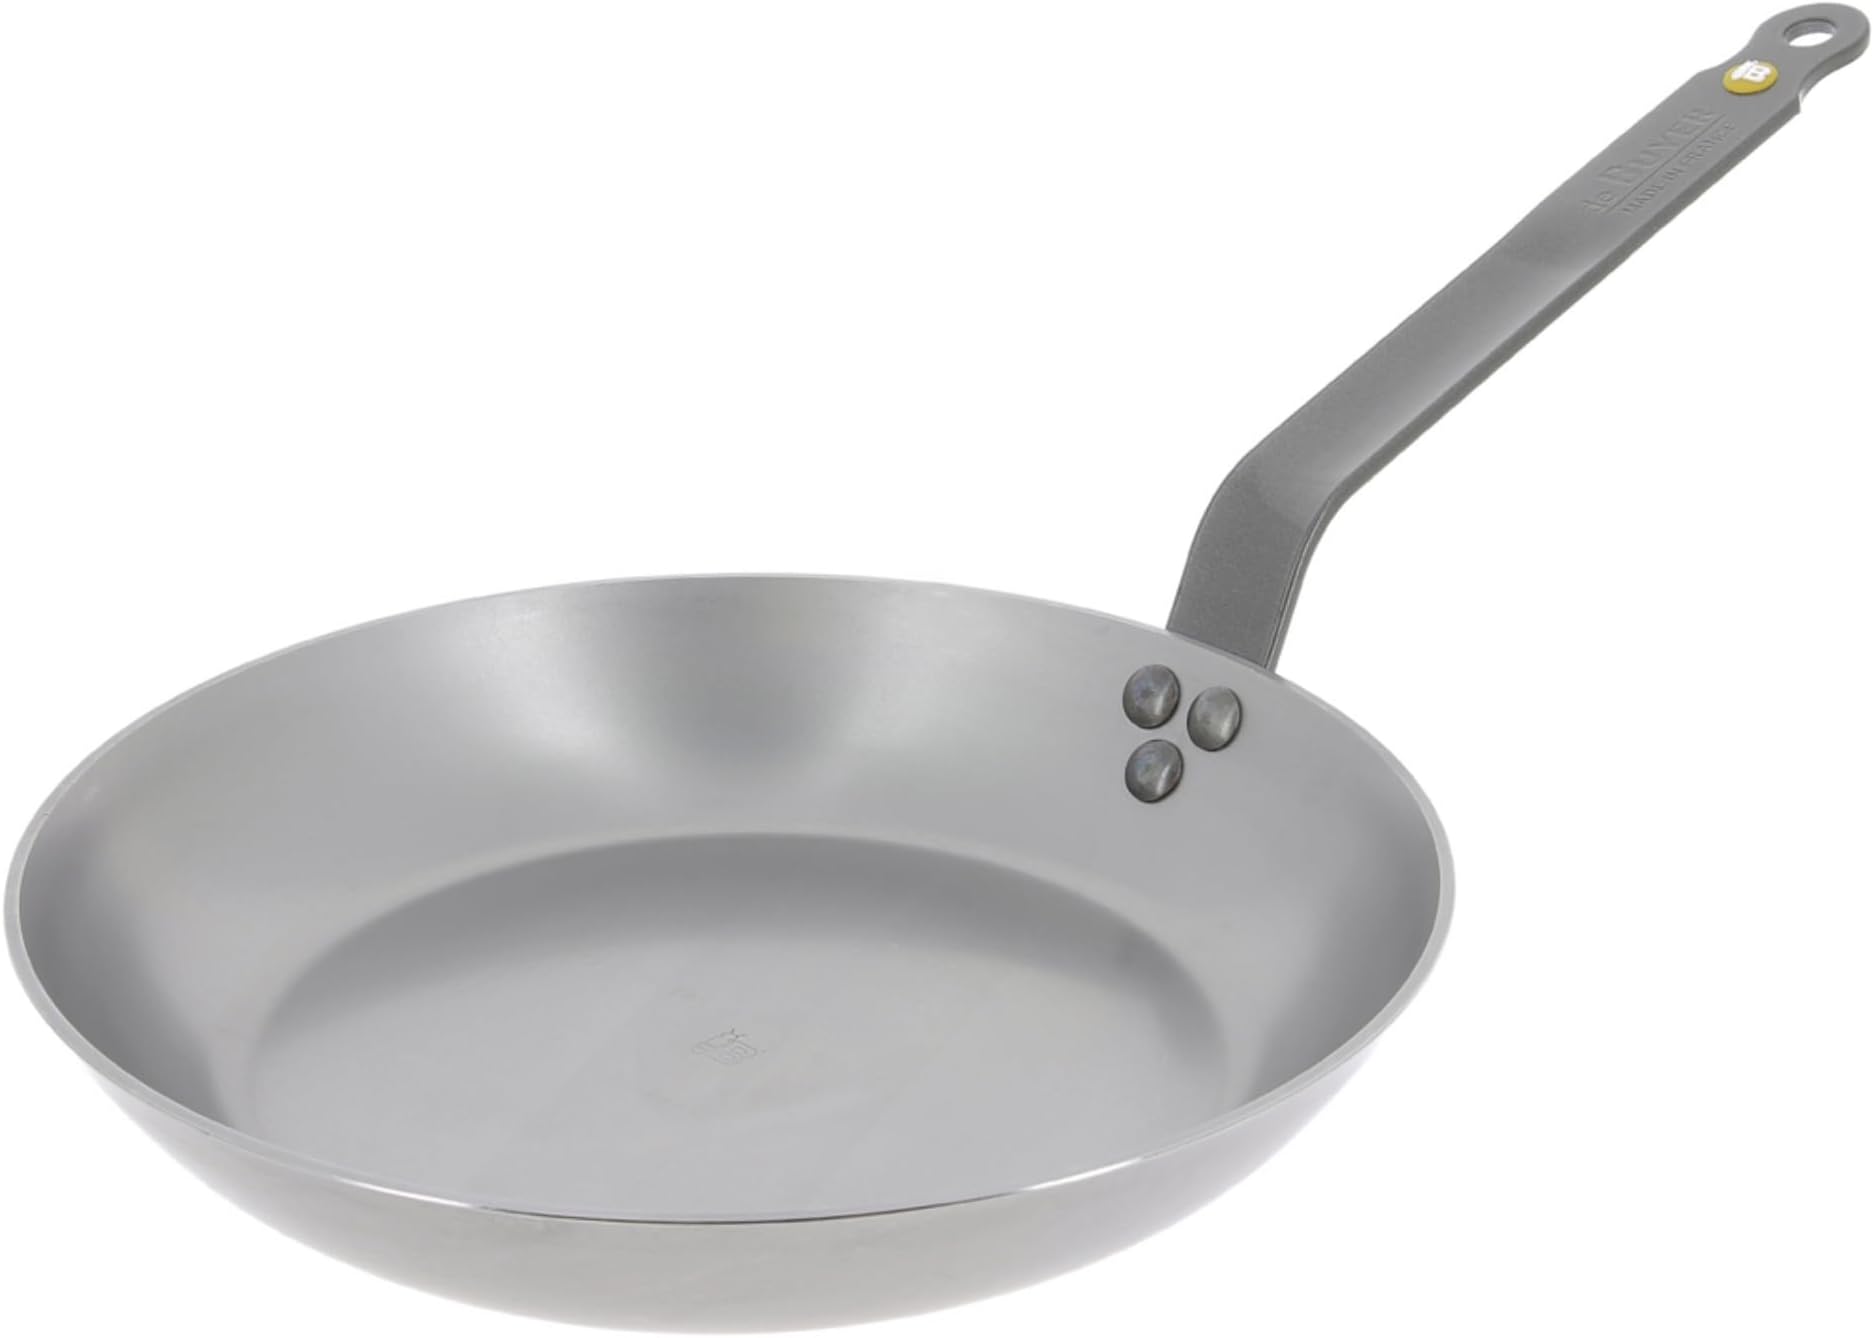
The De Buyer Mineral B 20cm frying pan is crafted from durable blue steel with a natural beeswax coating that develops a chemical-free non-stick surface through seasoning. Designed for professional-level heat distribution and compatibility with all cooktops including induction, it features a riveted iron handle for easy handling. Ideal for searing, frying, and sautéing, this pan demands care but rewards with unmatched longevity and cooking performance.


| ASIN | B00462QP0C |
| Best Sellers Rank | 68,894 in Home & Kitchen ( See Top 100 in Home & Kitchen ) 165 in Frying Pans |
| Brand | DE BUYER |
| Brand Name | DE BUYER |
| Capacity | 0.4 litres |
| Coating Description | Non-stick, Natural |
| Colour | Silver |
| Compatible Devices | Smooth Surface Induction |
| Compatible devices | Smooth Surface Induction |
| Country Of Origin | China |
| Customer Reviews | 4.5 out of 5 stars 12,701 Reviews |
| Global Trade Identification Number | 03011245610203 |
| Handle Material | Carbon Steel,Stainless Steel |
| Has Nonstick Coating | Yes |
| Included Components | Frypan |
| Is Oven Safe | Yes |
| Is the item dishwasher safe? | No |
| Item Shape | round |
| Item Type Name | de Buyer Carbon Steel Fry Pan |
| Item Weight | 0.9 Kilograms |
| Manufacturer | De Buyer |
| Manufacturer Part Number | 5610.20 |
| Manufacturer Warranty Description | Life time warranty. |
| Material | Blue Steel |
| Material Type | Blue Steel |
| Maximum Temperature | 400 Degrees Fahrenheit |
| Metal | Blue Steel |
| Model Name | Mineral B 8-Inch |
| Model Number | 5610.20 |
| Product Care Instructions | Hand Wash Only |
| Recommended Uses For Product | Sauté, fry, sear, and grill food |
| Special Features | Induction Stovetop Compatible |
| Special feature | Induction Stovetop Compatible |
| Specific Uses For Product | sauté, fry, and brown food on various cooking surfaces including induction hobs |
| Unit Count | 1.0 count |
C**N
Lovely pan to use - takes some looking after though
Having gone through two non-stick frying pans over the last 10 years, I decided to buy something a little more long lasting. I looked at some non-stick pans made from titanium, but they were roughly 30-50% more expensive than this De Buyer pan. I also considered the enamelled cast iron frying pans from Le Creuset, however, the cost and the sheer weight of the pans put me off. The De Buyer pan looks great to me. Functional and stylish. The handle is riveted onto the pan and the whole thing feels weight enough to be solid, but without the enormous heft of a cast iron pan. The handle has a smooth coating on it that feels nice, though be aware that it still conducts heat. If you are frying over a high heat, it is advisable to wrap a cloth over the handle or use oven gloves. The pan heats up quickly and is ideal for searing meats. 24cm is a good size when cooking for one or two people. This pan is not non-stick - you must season the pan and use it over time in order to build up a patina. The pan comes with some basic instructions on how to season. The more you cook with it, the darker the surface of the pan gets. This is normal and will help build your non-stick coating. Do not worry about it being unhygienic. Frying will kill anything on the cooking surface, though of course you should still wash the pan. De Buyer recommend purifying the pan occasionally to stop residues and odours from previous uses seeping in. You simply heat the pan over a high heat with cooking salt in the pan, and then wipe clean with a kitchen towel. You can use metal utensils on the surface, but also use your common sense. Hard and abrasive scraping will damage the coating you are trying to build up, and you risk scratching the metal. Cleaning is simple. Wash with hot water, a soft sponge and a tiny amount of washing up liquid. Wipe the pan dry all over, otherwise the pan may rust. Any bits of food that stick can be picked away with a plastic scraper or a slightly rougher sponge. Never use a metal scourer. Before you put it away, pour a little oil onto a kitchen towel and wipe the surface of the pan. Do not put it away without the cooking surface being oiled. Before you use it again, you can rinse it with hot water (and then dry). A few things to note if you are used to using non-stick pans: - the surface of the pan will darken and colour. This is a gradual process and the colouration does not happen evenly. If you like your pans to look beautiful and pristine, then these pans are not for you; - they take more looking after. You cannot use a dishwasher with these pans and you need to dry them thoroughly; and - as stated above, when cooking over a high heat, do not grab the handle without protection. For those that are fine with the maintenance aspect of these pans, I recommend them very highly. They are well made and do an exemplary job.
A**E
These pans are wonderful! The thickness and weight create an evenly-heated cooking ...
This was my first foray into the world of carbon steel cookware and it was a couple of months before I screwed up the courage to season my shiny new pan, having read everything I could find about the process, large swathes of which were contradictory! At least there was general consensus that it was impossible to make a mess of the pan: just strip it down and start again. Thankfully, I found a method that worked well (everyone seems to have their own, often idiosyncratic, method) and, after carefully only using the pan for meat, bacon and other highish fat content produce for the first few times, I ventured into pancakes. Then omelettes. Then plain old eggs. Then anything I could think of! I haven't cooked anything yet that has stuck even just a little bit. These pans are wonderful! The thickness and weight create an evenly-heated cooking surface and the high temperatures that can be achieved result in gloriously seared steaks. I've bought two more in different sizes/styles since and I felt so confident in their performance that, with the second one, I went straight for fried eggs immediately after seasoning. Perfect! If you have the patience to look after these pans properly - season them well initially, rinse after use with hot water and dry thoroughly - they will become your best friends! There are a lot of myths knocking around about how fragile and sensitive the seasoning can be with dire warnings regarding use and care. It's mostly nonsense put about by posers who think that making a mystery out of something that was an everyday occurrence before Teflon made an appearance makes them seem like some sort of culinary guru! If you read about the science behind seasoning you'll understand why. Carefully done (and rocket science it ain't), the seasoned surface is as hard as the steel pan itself and as slick as ice: you can only really damage it if that's your intention. Here are the only things I've found that can cause damage, and none of it is irreparable: 1. High concentrations of acid. Some say you should never put tomatoes or wine into a seasoned pan, which makes whipping up a well-flavoured pan sauce a little tricky. Small amounts for a short time will do no harm whatsoever. I'll deglaze with a little stock then add my wine and whatever else is going into the sauce, cook it on a high heat until it's reduced enough, serve it and rinse the pan immediately. No problem. 2. Digging at it with sharp stabby things. Obvious really. However, a good quality, flexible stainless steel spatula will serve you well. Using one to lift and turn your food makes sure that all the lovely little bits of crusty goodness are on your steak and not left behind on the pan. It's the single most important way I've found of keeping the seasoned surface smooth and gunk-free. Just don't dig! 3. Dry cooking. This won't actually damage anything but it will make avoiding (4) difficult. Always at least lightly brush your pan with your cooking fat of choice before cooking otherwise you'll have burnt bits adhering to the pan that even your spatula might not be able to handle. 4. Elbow grease! If fingernails can't pick the burnt bit off then you can use a scrubber or even wire wool but with a light touch. Remember, you'll be reseasoning your pan with subsequent uses so there's no harm in smoothing out any rough bits as long as the elbow grease stays under the kitchen sink! If you find you have to put in some effort to remove a spot then stop: it's probably supposed to be there. 5. Soap. Again, some will say you should never, ever use it. A long time ago, dishwashing soaps contained lye which would strip the surface off anything! Not any more though. It's best avoided on a regular basis but if you want to give your pan a good clean once in a while it won't hurt. Rinse well and wipe the pan with a drop of oil and a paper towel afterwards. Having become used to them and learning that they're not the fragile little hothouse flowers the Internet would have me believe, I can't recommend carbon steel, and the de Buyer brand in particular, highly enough.
J**N
Great classic frying pan
I'm a fan of traditional cookware such as cast iron and have never really liked non-stick pans as they are quite fragile. This is very nice quality pan, even the packaging is nice in a rustic french way, it comes in a brown paper bag with their stampings. The pan itself is very solid and robust, quite heavy as the steel used is about 3mm thick, the finish on it is beautiful, it appears to have been machined to get a smooth surface. The handle is heavy duty, it will get hot after a while but if you're used to these kinds of pans it's not a problem. I'm quite familiar with seasoning as I've owned cast iron cookware and woks before, so I was able to quickly season this with some oil. Pretty soon I was able to cook omlettes, pancakes and eggs no problem with no sticking. The great thing about this pan is the thermal mass, heating this up takes a while but it will stay at that temperature even when you add food to it, so excellent for searing steaks. I was surprised how even the heat on this is as well, pancakes came very evenly brown (steel is not the best conductor of heat compared to aluminium or copper), I think this is due to the thickness of it. The only downside is that since it is heavy it is hard to flick or handle. Also the handle is not too ergonomic, I had an issue when tipping it to the side it would sit on a nerve in my finger and make it go numb. However holding it with a pot holder or tea towel solves this problem. Overall I really love this pan, I made a Tarte Tatin the other week and it came out beautifully. It's main strength is that you don't have to baby it, if you accidentally scratch off the seasoning you just re-season it, it won't get damaged by too much heat or putting it in the oven. I can tell this pan will last a long time.
M**.
Pure quality.
I've been switching out all my non-stick cookware for cast iron, stainless steel and carbon steel. This was my first step and definitely my favourite to use. Cooking on induction is a breeze and everything that I've cooked on it has turned out great. Seasoning it took a little bit of work but after all the use it had it is still doing great, it's nice and heavy easy to look after with a chainmail "scrubby" and some hot water. Then you just dry it of and give it a light seasoning and your done.
P**1
Great Pan once properly seasoned
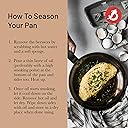
Great Pan once properly seasoned. Steps to seasoning this pan, the fast way without use of oven and very good results 1. Push out that stupid yellow plastic dot off the handle, its comes off with a good push - wont effect the seasoning but if you want to finish off an item in the oven then it could melt 2. Wash off the beeswax protection with 2 parts water 1 part washing up liquid 1 part salt using a soft yellow non abrasive sponge , about 2 minutes of scrubbing will suffice. 3. Crank up the heat, wait 1 minute and then add 1 teaspoon of raw food grade Flax-seed /linseed oil, run a screwed up paper towel around the pan to remove excess oil leaving a thin layer of oil without any pooling. 4. While still on the maximum heat -wait until the pan starts to smoke and most importantly let it smoke for a further 2 minutes - if it smokes too heavily adjust heat to allow a gently smoke to escape the pan 5.Leave the pan to cool upside down on a heatproof surface (30 minutes or 15 if left outside on a cold day). 6. Repeat this process of heating, thin layer of oil and cooling for up for a minimum of 2 times and maximum of 6. 7.Once you've repeated these steps a few times bring the pan up to heat and sacrifice one egg 4 tablespoons of salt in the pan and scramble cook and make a mess all around the pan like an amateur cook- it should stick to the pan at this stage. 8. Allow to cool slightly, wash off as much of the salt egg mixture as possible, and proceed to add 4 tablespoons of vegetable oil and 4 tablespoons of salt - make a nice slurry 9. Rub and massage this oil salt slurry mixture around the pan and inner walls of the pan with a screwed up kitchen paper towel - the more time the better (3 minutes is a good start) wash away the slurry with hot water and washing up liquid of your choice. 10. If you followed these steps you'll have a silky smoother seasoned dark pan with great non stick properties. Avoid leaving pan to soak in water overnight and when washing avoid an abrasive scourer
C**J
Solid pan
I’ve had my eye on this for a long time. A very high quality carbon steel pan that I can use for steaks, fish, eggs, fry ups etc. I already have a carbon steel wok so I know about seasoning the pan and caring for it. Within 30 mins I was frying an egg with zero sticking. The only downside is the pan is quite heavy so it’s often better to bring the plate to the pan rather than the pan to plate. Also be aware the handle will get hot eventually if you’re on a high heat. If you use in the oven at all then it’s a good habit to keep a cloth handy for picking it up. There are far cheaper pans which will have similar performance but I knew this one would be robust enough to last a lifetime or more. No more issues with teflon coatings wearing off. I have used on gas and induction with no problems.
D**B
The pan every kitchen needs
After making the decision to invest only in quality cookware that lasts and stop wasting money on nonstick pans that become everything sticks pans only after few uses I bought my first cast iron. I fell in love with it but it was just too big for eggs. I started battling between getting a smaller cast iron or carbon steel. After a long research I bought this carbon steel with the hope it will be lighter. To my disappointment, it turned out it is almost as heavy as the cast iron and I terribly dislike the design of the handle, it is too long and too much on the way. Well, this didn’t put me off. I had to try it and find out why so many people love it. I started by following instructions for cleaning the wax but my patience didn’t last, I got out my barkeeper’s best friend and all the wax was cleared in no time. I have ceramic hobs and i knew following instructions for seasoning was going to be time consuming. So I took all risks and seasoned it in the oven. It was time for the test and the pan didn’t disappoint. As much as I love my cast iron this carbon steel was the best ever nonstick pan I’ve ever used. I will never waste my money again buying pans that do more harm then good. I still hate the handle though, but all other high end brands have very similar handles so unless something new comes on the market i am sticking to this non sticking pan.
F**R
A pan for all seasons
Before getting this pan I had mostly used Tefal non-stick pans . While their non-stick properties are quite incredible, they’re damaged by use at high temperatures. I needed a pan to cook steak and after some research settled on this one for that purpose. I had started out looking for cast iron but read that carbon steel was preferable and De Buyer was the best in its class. Having got the pan, my next challenge was to season it. I had not seasoned a pan before so followed the instructions in the booklet, i.e. wash the pan thoroughly to remove the protective coating, put in 1 mm of oil (type unspecified), heat until smoking, allow to cool, wipe out and it’s ready to use … YEAH, RIGHT. The result was a ring of sticky gunk around the side and the cooking surface remaining almost unchanged. So, my big hint is to ignore the booklet. After further searching I found a video on YouTube that seemed more convincing. To locate it, search for “thevollrathcompany fry pan seasoning”. In summary this process entails getting Flaxseed Oil ( such at this ). Flaxseed oil seems particularly important for getting quick results and a hard polymerised surface. The method is to heat the pan, and pour in a VERY SMALL amount of oil and then wipe it round with kitchen paper so only the finest layer remains. Heat until smoking and allow to cool. If this is done correctly after the first seasoning the pan should have gone from silver to a pale bronze colour. Then, keep repeating these steps until the pan is a glossy dark brown or black. The sign that you’ve succeeded is a hard shiny surface that’s not sticky. Stickiness seems to be because the pan has not been heated sufficiently to allow the polymerisation (or you’ve used too much oil). I’ve attached a picture of my pan as it is now. I can’t remember how many times I’ve gone through the seasoning steps listed above, but probably more than a dozen times. I’ve also been using the pan in the meantime. Having got the seasoning done I find the surface is quite resilient. When I have had food burn on I have used washing up liquid and a brush. In one case also careful use of a green plastic scourer, though after that I did re-season with two re-heatings and it was as good as before. Generally, wiping out with kitchen paper alone is sufficient. It is, of course, also essential to ensure the pan is covered with a fine film of oil before storing it. I understand that one should not cook tomatoes in a seasoned pan as this will eat through the seasoning layer. As for the non-stick properties, in honesty it doesn’t approach the Tefal pans’ magical quality but it’s pretty good. For example, I can fry eggs in a minimal amount of fat without them sticking. Steak isn't a problem at all. As a result it’s everything I hoped it would be. From that I can say if you are happy to put the effort into preparing the pan and caring for it, I recommend it highly. A concern I had before buying this was: would I be able to touch the metal handle when the pan was hot? The answer is yes and no. It is a long handle and I have always found I can hold the end, though the nearer to the pan one gets, the hotter it gets so some care is needed when the pan has been on the heat for a long time. One last thing to bear in mind if considering this pan is that it is heavy - very heavy. You would need the wrists of Rambo to toss a pancake! UPDATE: Another customer has commented: "I followed the instructions to the letter in the youtube video. Repeated 12x. Took a whole day. Got the pan black exactly as the chef showed. Then I trialled it by cooking some bacon. It didn't just stick slightly but completely. What a joke." I would like to say that I have not had problems with food sticking like that. To demonstrate this I have added a further four photos. These show: bacon cooking, the state of the pan when the bacon is removed, eggs cooking in the same fat and the final state of the pan.
M**O
super patelnia
na początku potrzeba nauczyć się prawidłowego użytkowania i czyszczenia ,a potem można już smażyć kotlety schabowe mniam :]
M**L
Excelente sartén
Después de 6 meses de uso ocasional, puedo decir que por fin aprendí a cocinar con esta sartén. Sin duda, cuando no tienes experiencia, piensas que no sirve porque todo se pega, pero es un proceso de prueba y error. No se rindan, vale la pena. En esta ocasión estoy cocinando con una pequeña cantidad de aceite de oliva extra virgen, a una temperatura baja para que el aceite nunca llegue a quemarse. Aprende a usarlo y será tu sartén favorita.
A**A
¡MAGNIFICA!
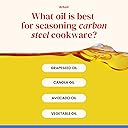
La verdad es que estoy muy contento con esta sartén. La compré porque quiero abandonar las sartenes tóxicas con Teflon y también para aportarle más sabor a las comidas. Las sartenes con Teflon no son aptas para hacer una buena carne o un bacon crujiente. En estas sartenes la carne se cuece, no se fríe, la carne no se sella bien y suelta todo su jugo en la sartén. Con las sartenes de hierro al carbono no pasa esto. Os voy a contar mi experiencia con la sartén Mineral B de De Buyer: - El curado: hay muchos vídeos en internet y muchas opiniones diferentes sobre cómo realizar el curado de una sartén de acero al carbono. Si queréis que os salga bien os recomiendo que hagáis lo que he hecho yo: seguir solo las instrucciones del fabricante, porque cada fabricante tendrá su recomendación en función de su producto. Como podéis ver en las fotos, el curado ha salido muy bien. El vídeo lo encontráis en el canal de De Buyer. EL CURADO, breve resumen: 1. No uséis aceite de oliva para el curado ni otros aceites exóticos, ya que estos tienen su punto de quemado en 160 grados, lo que es muy poco. En cambio el fabricante recomienda aceite de canola(colsa) o de girasol. Yo he usado aceite de girasol y todo perfecto, tiene el punto de quemado en unos 240 grados. 2. Muy importante la temperatura: con una cocina de gas se recomienda fuego medio-alto. En cocina eléctrica NUNCA subáis la temperatura al máximo. Aun así, el curado saldrá mucho mejor en una cocina de gas. 3. Echar aceite en la sartén hasta que cubra todo el fondo, de 1 milímetro más o menos. 4. Dejar que el aceite haga su trabajo durante 10 minutos. Podéis remover de vez en cuando para distribuir el aceite caliente también por los laterales de la sartén. 5. Tras 10 minutos el aceite ya estará sacando humo y entonces podéis apagar el fuego. Dejar el aceite en la sartén hasta que se enfríe del todo y luego retirarlo. Limpiar la sartén con papel de cocina para retirar el exceso de aceite y ya está. COCINAR: 1. El aceite: de ni guns manera hay que utilizar aceite de oliva virgen extra para cocinar en estas sartenes, ya que este tipo de sartén trabaja con temperaturas altas y el aceite de oliva virgen extra solo se puede usar hasta 160 grados. Recomendable usar aceite de oliva virgen, de girasol, de cacahuete, de canola. Todos estos aceites aguantan temperaturas de 220-240 grados. Si queréis usar mantequilla para darle un poco de sabor a la carne, a una tortilla francesa o huevos fritos, añadir la mantequilla al final de la preparación. 2. La temperatura de la sartén, para sellar bien la carne y que conserve dentro todo su jugo: como podéis ver en mi vídeo la temperatura de una sartén de acero al carbono se puede comprobar igual que se hace en una de acero inoxidable. Se salpica con un poco de agua, si el agua se evapora la sartén no tiene la temperatura óptima, si el agua forma una bolitas que bailan por toda la sartén entonces ya se puede añadir el aceite, se deja unos segundos y ya se puede añadir la carne. 3. Se recomienda tener la carne unos 20-30 minutos a la temperatura ambiente antes de echarla a la sartén, para evitar que se pegue. Personalmente yo solo le echo pimienta y a la hora de sacarla le echo sal marina en escamas mientras la dejo que descanse un poco en el plato. 4. Muy importante no dar la vuelta a la carne al menos 1 minuto, ya que la carne estará pegada hasta que se produzca el sellado. Cuando esto ocurra, la carne se despegará con mucha facilidad de la sartén y se le puede dar la vuelta. En mi caso, los entrecots que me han tocado eran muy finos para mi gusto pero al final han salido bien. Lo suyo es practicar hasta que le encuentres el punto a la carne, tal como te gusta. 5. La prueba del huevo frito: el fabricante nos dice que la capa antiadherente se realiza con el tiempo, cuanto más cocines, menos se pegará la comida. Para preparar huevos nos dice que esto sería posible después de contar al menos 10 veces proteína, carne roja sobre todo. Yo hice la prueba el día siguiente, en el segundo uso y la verdad es que no se han pegado. Primero he preparado el bacon, muy importante, ponerlo con la sartén fría y sin nada de aceite, así se calentará a la vez con la sartén y soltará su grasa, lo que le ayudará a freírse y no pegarse. Después de retirar el bacon, en la misma grasa que este ha soldado , he añadido un poco de mantequilla y he freído los huevos. El resultado final, divino, me ha recordado a mi infancia, cuando mi abuela nos preparaba el desayuno, salchichas o pancetta con huevos fritos en manteca, en su sartén de hierro fundido. 6. Muy importante: en las sartenes de hierro fundido y hierro al carbono no se recomienda cocinar alimentos ácidos: tomates, limón, vino, vinagre…Los alimentos ácidos afectan a la capa antiadherente y puede darle un sabor metálico a la comida. LIMPIEZA: 1. Nunca uséis jabón, lavavajillas o cualquier otro detergente con este tipo de sartenes. Tampoco hay que dejarla en remojo o meter a en el lavavajillas. Se limpia a mano con agua caliente y un estropajo. 2. Cuando has derribado de cocinar, recomiendo dejar la sartén a que se enfríe un poco antes de limpiarla con agua muy caliente. Nunca echéis agua fría sobre la sartén caliente porque vais a deformar la sartén. Este tipo de material es sensible a los cambios bruscos de temperatura. Si quedan restos muy pegados y no se quitan con agua caliente y con el estropajo, podéis echar agua y ponerla sobre el fuego hasta que empiece a hervir y luego rascando con una estatura de madera se quitará todo. Otro método de retirar comida pegada, esto puede ocurre cuando los restos de comida se deja mucho tiempo en la sartén o cuando se ha quemado la comida por haberla dejado más tiempo de lo necesarios y se ha superado la temperatura recomendada, es usando sal gruesa. Echáis la sal en la sartén y con papel de cocina empezáis a frotar. Luego se eliminará todo con agua caliente y un estropajo. 3. Después de limpiarla hay que secarla bien con un paño o papel de cocina. También es recomendable ponerla unos segundos sobre el fuego para así eliminar todo el agua de los poros. 4. Antes de guardarla, y aquí es donde mucha gente comete el error de no seguir estos pasos: con la sartén fría, hay que aplicarle una capa fina de aceite por toda la superficie(menos en mango) para así evitar que esta oxide. Echar unas gotas de aceite sobre un papel de cocina y frotar bien la sartén. Es muy importante que la sartén esté fría, si no, el aceite se convertirá en una capa muy pegajosa. Si vas a usar la sartén por ejemplo por la maña y luego otra vez por la tarde, entonces no tiene ningún sentido aplicar esa capa de aceite, la sartén no va a oxidar en unas horas. CONCLUSIÓN FINAL: Sin duda alguna la compra de esta sartén ha sido un acierto total. Es verdad que es pesada, personalmente la pongo sobre el fuego y no la muevo mientras cocino con ella. Es verdad que necesita más cuidados que una sartén convencional de aluminio con Teflon pero para mi vale la pena. Para mi es mucho más importante mi salud y la de mi familia. Es una sartén segura, libre de cualquier tóxico y si la cuidas bien es una sartén para toda la vida. Para cocinar guisos y alimentos ácidos vamos a comprar unas cacerolas de hierro fundido esmaltado.
S**Y
Beautiful pan that cooks like a charm
Great Pan and cooks really well! It is heavy, almost like cast iron, but is super durable and I am waiting to see it's color change, as it almost looks like a stainless steel pan when new - so it's surprising it will move to a black with good use. The rest is the same - seasoning and taking care of iron pans.. a few extra steps but worth the care!
S**.
Ottima padella
Ottima padella, solida e concreta. Promette e mantiene le aspettative che avevo. La cosiddetta stagionatura è stata molto semplice ed efficace perciò invito i potenziali acquirenti a non avere timori eccessivi e lanciarsi nel l’acquisto. Antiaderenza al top, i cibi non si attaccano
Trustpilot
2 weeks ago
1 month ago