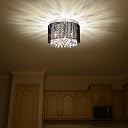
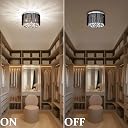
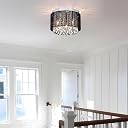
I wish I could say that this was just a matter of bad quality control or some manufacturing mistake. But no actually, I'm pretty sure what I received is the same thing I would receive if I were to order a second one. It's not just cheaply produced and made of garbage, it is alsoa completely ill-conceived janky hacky nightmare. First of all, the instructions are like some sort of prank. They literally ask the user to do things which are physically impossible, omit details about certain steps like what parts to use, are missing item labels on their diagrams, and contradict themselves. The first issue I faced is that the two screws it came with to mount the crossbar to the electrical box *aren't the right diameter* and so are not usable. I don't know what country uses that size screw but I am in the United States. So I was forced to try to use the screws from my old light fixture with this one, but one of them was too short to be driven all the way through this fixture's longer crossbar that had to be placed further away from the screw-holes on the in-set electrical box. So I ended up just using one screw and making it really tight. That's right, the whole fixture is now mounted to my ceiling, ultimately, with a single small off-center screw. Second is the instructions and parts regarding the new long crossbar. The instructions show that you should drive the screws through the new longer crossbar as well as the *old* shorter crossbar underneath it. This instruction frankly doesn't make much sense because the shorter crossbar just dangles there loose in between the new crossbar and the electrical box, there's nothing holding it in place. This isn't critical, but it's janky and remember that phrase "nothing holding it in place" because the creators of this thing seem to not know the concept. Next comes these strange green pieces of which I do not know the name, but they are basically plastic rods about an inch long which have a hole in them to drive a screw into. You're supposed to place these rods in between the long crossbar and your ceiling in order to create a gap between the ceiling and the crossbar in order to make sure the screws which mount the crossbar to the fixture baseplate would reach all the way to the bottom side of the baseplate, while still keeping things tight. Well, the green rods are LONGER THAN THE SCREWS YOU ARE SUPPOSED TO DRIVE THROUGH THE CROSSBAR AND INTO THE CEILING. THE SCREWS CANNOT REACH THE HOLES IN THE CEILING IF YOU DO THIS. THERE IS NO PHYSICAL WAY TO ACHIEVE THIS STEP. I ended up just not using these rods and making the bar flush to my ceiling instead. The screws to mount the fixture baseplate on the crossbar still reached through it, thank god. There is also a step which mentions a "part E" on the diagram. There is no part E on the diagram. but there is A B C D F and G! Then there is actually wiring everything up. Thankfully this was the easiest step and the only one that seemed high quality, probably just because there are regulations. However, the provided wire nuts were way too small for a lot of common neutral wires, and I ended up having to use my own wire nuts. Oh, additionally, there is a diagram which tells you to wrap a wire against some screw in the crossbar. The long crossbar specifically that they provided. But there is no such provided screw and there is nowhere do even put such a screw if you had it! Then there's installing the shade onto the base plate. The only thing this step does correctly is tell you to use the smaller screws to do it. But where you screw them into is a mystery. There is just big holes in the base plate that are larger than the diameter of the screw heads, and don't have anything on the other side to screw them into. I figured I could use a nut on the other side, but the instructions didn't make this clear. The nut is also smaller than the hole diameter, so I needed to improvise and add washers to both sides, even though the instructions only said to use washers on one side. Which again, would have made mounting the shade impossible. I was able to get extra washers by taking the two away from the screws mounting the base-plate to the ceiling. Hope those weren't important! Then there's actually screwing the thumbscrews onto the baseplate that secure the whole fixture into the ceiling. On the bottom side of the baseplate facing the floor you put thumbscrews on the end of regular screws which are coming through from behind it, the tops of those screws are at this point facing the ceiling which is no longer accessible. So you have to screw these thumbscrews onto the screws with just your fingers, but once they are even a little bit tight (and by a little I mean still very much loose) the whole screw-thumbscrew pair just rotates as a whole, because there's nothing holding it in place. So it's impossible to actually make this thing tight against your ceiling. Most concerningly though, it may be impossible to actually take it OFF my ceiling, because turning the thumbscrews in either direction *does nothing* but turn the entire screw-thumbscrew pair without loosening or tightening anything. More than that, I may NEED to figure out how to take it off, because this thing did not come with any insulation or include and instructions on the subkect. Maybe this is normal however and you need to supply your own, I dont know. Lastly, there's the actual jewels you have to hang on the baseplate. These things are the cheapest most sparkle-less gem-style cut plastic I've ever seen. And despite being plastic, if you drop them, they'll break. I know because I had 3 break! Good thing there were extras, but only 2 extras. Why did I deal with so many breakages? Well because the gem strings do not stay properly in the loops. This one is partially my fault, I COULD have pre-bent all of the hooks to be more hook-shaped and avoided this issue. But they seemed to fall out of the hoops surprisingly often even when I *did* pre-bend them. This whole things is a freaking disaster of a product. I have an unsafe uninsulated light fixture with gems that are going to all fall off and break next time I go to change a light bulb (all of which are crooked by the way), missing and dangling pieces internally (even in the electrical box), that is loose and wobbly on my ceiling, hanging by a single off-center screw, grounded on some random piece of metal because the thing it told me to ground it to didn't exist, and the whole fixture is likely impossible to take down without just smashing it to pieces. This feels like an AI generated product, like no human being saw this thing even once before it was put up for sale. This should be removed from the market and its creators blacklisted from making listings on as many sites as possible.