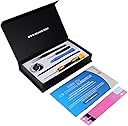
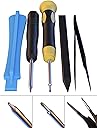
๐ง Empower Your iPhone Repair Journey!
The ScandiTech Battery iP6 Plus is a high-quality replacement battery designed specifically for the iPhone 6+. With a capacity of 2915 mAh and a complete toolkit included, this battery allows for a quick and efficient DIY repair in just 15 minutes. It comes with a 1-year warranty, ensuring reliability and peace of mind.


| Customer Reviews | 4.2 out of 5 stars 323 Reviews |
R**Y
and it's the only company I'm comfortable putting an aftermarket battery into my main device from ...
This was my 2nd time getting a battery from Scanditech, and it's the only company I'm comfortable putting an aftermarket battery into my main device from Amazon. I had an issue a few months ago with a Scanditech iPhone 5 battery and they sent out a replacement immediately after contacting their customer service. This kit is great, the tools are the highest quality I've ever received from a repair kit, and I've probably had around 10 of them dating back to my old iPhone 3g. The pry tool and the pentalobe driver were the same as in most cheap kits, but the Phillips driver was nice and well magnetized, and the tweezees were an excellent addition to my repair kit. The included adhesive was simple to install and seems OEM quality. My battery was charged to 93% out of the box, and it shows it has never had a charging cycle. Battery life is hugely improved over my old battery that had nearly 700 charge cycles. I ordered a battery for my SO's iPhone 6 as well and just installed it, seems great so far.
C**F
High quality replacement with all the tools and excellent instructions.
Awesome, really can't complain at all. The installation, watch the video first, then read the instructions, then watch the video again. Then prepare your work space, you need to have space (with wind or vibration) to work, so that you can layout screws in order to replace them as they are different sizes and lengths. Be in a calm, patient mood. Do not "force" screws to unscrew or indeed do not try to over tighten them. I did NOT disconnect the camera etc, just managed to use my laptop to hold the screen up 90o from the base, and when removing the battery which requires a little bit of moving around I had someone just use a finger to keep the screen steady, which worked for me and saved several screws from being taken out and put back in order. If you are doing this on your own, you must disconnect the screen from the base - I just can't see how you cannot do that without having a very high chance of damage to the camera/cables as it gets a bit physical in the battery removal due to the glue. Really, this was very straight forward. The only "hard" part was being patient with the hairdryer to loosen the glue strips but having watched the video it came out exactly as they said, if it doesn't then just apply some more heat, or at least heat between each strip removal. Couldn't be happier with my purchase and the battery appeared to be of very high quality and the box contains everything you need except a hairdryer! It works well, and my iPhone 6+ is like new lasting easily a full day.
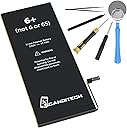
S**S
Really good tool kit, Highly recommend this kit to anyone looking to replace their iphone 6+ battery
Includes glue strips (two sets) so you don't need to order extra. Nice packaging (well thought out) and these guys have spent a lot of time with the included installation documentation and more so with their online guides. (Not your usual "Engrish" translations) It even covers in great detail how to apply the battery glue, and 3 methods of extracting the old battery to cover all possible scenarios. The batteries appear to be the same as the stock Apple batteries rebadged. (The specs printed on the back follow the same layout, format and content as the original batteries, included Date of Manufacture (Mine was stamped Feb 2017) Thanks to the guides the installation was very simple and successful. The "Sucker" is actually reinforced unlike the image shown. With other tool kits like this I've frequently seen the metal ring pull through and split the sucker (making it useless) however in this kit this the pull ring is heavily reinforced. If you can pull the metal ring off through normal use, you need to star in your own Marvel comic strip! This is a great kit, great instructions included and online guide has lots of detailed pictures which are also extremely helpful.
S**E
Replacing the Battery Was No Party!
Must warn readers that I am a 60+ year old woman who doesn't know anything about the guts of an iPhone. For example I have no idea what a motherboard is. I am good at reading instructions and have a lot of patience. For example, I have put together a houseful of IKEA furniture without any problems. Yesterday I replaced my battery and it was challenging to say the least. I wasn't impressed with tools they provided other than the screw drivers and suction cup (more on that later). The instruction pamphlet is not sufficient at all so I don't know why they even bother to include it. It gives you a false sense that you can replace the battery using these instructions. After you go through some of the steps you then realize that there is no way you can replace the battery without going on the website and reading through the much more detailed instructions. Getting the battery out of the phone was dreadful. I started this process before I watched the video. Perhaps if I would have been more careful with removing the glue strips under the battery, my experience would have been easier. Having said this, even the website instructions warn you that most people don't have success with removing the strips easily and end up prying the old battery out. I was so paranoid about bending or puncturing the battery and having it catching on fire (instruction warning) that it took me over 2 hours to pry it out. I finally had to use my own tools (a paint can lid opener and large screw driver) because I just couldn't get the leverage with their tools that they provided. I decided that the suggestion in the instructions to use dental floss was to just add more torture. I tried and of course it just ripped in half. I did end up puncturing a small hole in the old battery but I survived - no fire, nuclear explosion, etc.. I didn't disconnect the wires at the top of the phone (which would allow you to completely remove the top lid of the phone from the bottom lid) because they warn you that you can do just as much damage (if you are not super careful) doing this as leaving them intact. This requires you to keep the top part of the top lid on the phone somewhat engaged with the bottom part. It can't be opened from the bottom part of the phone by more than 90 degrees. Per the instructions if you don't disconnect the wires at the top, the phone lid can not be entirely removed and must be held open with one hand the whole time you are working on replacing the battery. Nonsense! That would have been impossible - you need both hands for this process! I attached the suction cup to the top lid and rigged it up to another solid object on my counter top so it stayed open at 90 degrees while I worked on the phone. I gave this product three stars entirely because of the instructions/tools. After I finally got the new battery in the phone, it worked and it is certainly holding a charge much better than my 2 hour max charge with my old one.
M**V
Good battery, tools and online instructions. My iPhone is like new again.
Excellent battery and tools. Thanks to all the positive reviews, I replaced my failing battery on my phone with Scanditech's battery. If you have patience, are attentive to details, follow directions well and can work with the tiniest components then you may find replacing your iphone battery fairly easy. For me it wasn't easy but not as hard as I anticipated. I took my time, about 1.5 hours with several distractions, but my phone works like new. After a week of heavy use, the battery has been going strong with 100% battery health and 18-24 hours battery life per cycle. If this battery lasts me 9-12 months, I would go do this again. Tips that helped me immensely was to print the screw diagrams (3 pages) then scotch tape the tiny screws to their location on the diagram. This made reassembly of the screws a snap. A good work lamp and magnifying glass also was helpful for my less than perfect eyes. I followed the video instructions step by step as I was working, pausing as needed.
J**M
The video does a very good job. I successfully removed the old battery
Anyone who would even think of attempting to use the printed instructions only is most likely to get into trouble. The video does a very good job. I successfully removed the old battery, but let me tell you, it was NOT easy and it was NOT fast and it took a LOT of persistence. All went well until I tried reconnecting the 4 cables. The guy on the video clearly states that reconnecting the cables is DIFFICULT and they have to be aligned PRECISELY or it will not work. Additionally, when you "think" they are aligned...you press down and hope to hear the "soft click", but if you push down too hard you can damage the connector - good luck with that!!! Oh, and when you need "help" or have a question? You click on "contact" and all you can do is send an email - good luck with that one too! I don't mean to sound naive, but when I see some of the glowing ratings for products anywhere, I seriously have to wonder how many of the raters are "sponsored by the company" selling the product. So ya, time to purchase a new iPhone. Oh, wait...what is that i hear? Oh! It's the medicine man rolling into town - at least I know HE will sell something..."guaranteed to work". Seriously, good luck, perhaps it's worth a try - it just didn't work for me. I am no pro, but I have assembled from scractch a complete transceiver and power supply, so although I am no pro, I not exactly new to electronics. Good luck!
R**N
Reasonable installation.
My iPhone 6+'s battery was dying at 40% and I was having to keep the phone near or on a charger; it was lasting about 6-8 hours. When my phone was new 26 months ago, I could go 36 hours without a charge. My phone was also a few weeks out of warranty. I therefore started looking for battery replacements. I purchased this kit despite its being higher-priced than other similar replacement batteries, because of the number of positive reviews. This kit comes with the battery and all the tools you'll need. It is well and imaginatively packed. Opening the kit is made to be almost as special an experience as opening an iPhone. Instructions are clearly printed on a card included in the package, and the seller's website also has a video explaining each step in exhausting detail. The most difficult part for me was stripping the old adhesive off. That took about ten minutes and the use of my wife's hair dryer to complete. I use Coconut Battery and the screen shot of the fully charged battery is below. As you can see, it is clearly a fresh, new battery at full capacity. I haven't given this item five stars only because I'd like to monitor how well the battery behaves over the next few weeks before being more positive.
A**R
Easy to install iPhone 6 plus battery if following guide on website
I've replaced several iPhone batteries before this iPhone 6 Plus and I have to say, Apple makes it a bit more complicated for each model. If you have replaced batteries on iPhones before but not yet on the 6 Plus, make sure to read and watch the guide on ScandiTech's website. There are minor, but crucial, differences between each model and you need to know this in order to successfully replace your battery. For me, the most difficult part was removing the battery. It's held down by strong adhesive and as I eagerly progressed, the adhesive strip that you should pull out ripped. I had to pry up the battery with the tweezers. This took some time but I got it out in the end. I can recommend everyone to move very slowly once you get to the "pulling out the adhesive"-part as it is much, much easier to get the battery out if you're able to pull out the adhesive. So far the battery is performing as expected. I am not getting the uptime that I got when the phone was completely new but this it to be expected as I have a lot more apps now.
Trustpilot
1 month ago
1 week ago