


🚗 See the unseen with eRapta's cutting-edge clarity!
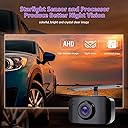
The eRapta Reverse Camera 3.0 is an advanced backup camera designed for optimal safety and convenience. Featuring a 720P HD chipset, IP69K waterproof rating, and starlight night vision, this camera ensures clear visibility in all conditions. Its versatile installation options and wide compatibility make it an ideal choice for various vehicles, providing peace of mind for drivers.





| ASIN | B08JCXX7QS |
| Best Sellers Rank | #177,970 in Electronics ( See Top 100 in Electronics ) #2,834 in Vehicle Backup Cameras |
| Brand | eRapta |
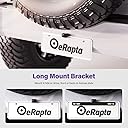
| Built-In Media | 4Pin power cable*1, Backup Camera*1, Long bracket*1, Short bracket*1, Video Cable*1 |
| Compatible Devices | automotive Car Truck SUV RV Pickup Trailer Minivan Van Jeep |
| Connector Type | RCA |
| Customer Reviews | 4.3 out of 5 stars 900 Reviews |
| Display Technology | LCD |
| Effective Still Resolution | 1280 Pixels |
| Field Of View | 149 Degrees |
| Installation Type | Surface Mount |
| Item Dimensions L x W x H | 10"L x 3"W x 2"H |
| Item Type Name | Backup Camera |
| Lens | Wide Angle |
| Lux rating | 0.1 Lux |
| Manufacturer | eRapta |
| Mfr Part Number | ERT11 |
| Model Number | ERT11 3.0 |
| Optical Sensor Size | 0.33 inches |
| Optical Sensor Technology | Starlight Image Sensor |
| Product Dimensions | 10"L x 3"W x 2"H |
| Real Angle of View | 140 Degrees |
| Screen Size | 0.33 Inches |
| Video Capture Resolution | 720p |
| Voltage | 24 Volts |
| Warranty Description | 2 yeas warranty |
J**Y
eRapta ERT11 vs. ERT01 vs. Boyo: Which license plate camera is best?
Please stay with me as we delve into the details. I specialize in tech reviews. In general, these license plate cameras can be a great buy, yet all brands in this price range face reliability challenges. This means great customer service and ease of replacement are essentials. WHICH eRAPTA? ERT11 VS. ERT01: First, be sure you have received the latest design with the all metal bracket. If yes, both are rated at IP69 to keep the water out! Both are considered high res at 1280 x 720 pixels. However, the fact they use standard RCA connectors makes this claim one not to rely on. In real world use, the eRapta’s typically yield a very impressive and sharp image, with quite decent color fidelity, too. Both are also related down to .1 LUX. A lower number is better—meaning they resolve low light well. Of these two, I suggest spending just a little more for the ERT11 without lights. Cameras like these rely on your tail lights plus their LUX rating. Ask yourself, how many built in car camera have mini LED lights surrounding them? Answer: None. No mini LEDs means one less thing to go wrong and a few users have complained about the ERT01 lights getting stuck in the on position. Subtle is best so after auditioning both, I went with the ERT11. WHAT ABOUT BOYO? The Boyo’s advantage lies in its superior bracket. Many factory cameras such as those on our Audi’s and Honda’s rely on a 45 degree angle. Boyo makes it easy to swivel the camera on the bracket to get the angle right. These allows for more accurate guidelines placement, too. On the downside, its resolution is 600TVL which actually means 720 x 480. Is this a disadvantage vs. eRapta? Yes and no. If you have purchased a high-end digital media receiver with a true high res screen, go with eRapta for sure. However, most screens like my Pioneer resolve about 800 x 400. They do not upsample images. Thus, when comparing eRapta to Boyo, resolution is not a strong determinant of image quality for most users. Most importantly, the Boyo is not sealed as well as the latest eRapta design. This means it is much more likely to get water inside. Thus, after evaluating both, despite the challenges with eRapta’s less versatile bracket, it’s the clear choice for me. WHAT ABOUT eRAPTA’S 149 DEGREE ANGLE VS. 170 FOR BOYA? Speaking from the perspective of a professional photographer, I would much rather have a camera slightly less wide at 149 degrees. The distortion is less and the view is still very wide. The wider the angle, the more far away that people behind you will appear in a parking lot. I can see a small child better with as a slightly tighter field of view. HOW TO ADJUST THAT DARN FRUSTRATING eRAPTA BRACKET? Although I am a huge fan of the ERT11, the only way to change the angle is by bending the bracket. Thirty-five degrees is the limit. Why is this an issue? If you don’t cut the green wire and decide to use the built in guidelines, for many cars this will leave the lines floating in space. Using two pairs of pliers, including one needle nose, I was able to bend the bracket out to get the angle much closer to 45 degrees. I also placed a small triangular shaped binder clip behind the top of the license plate to make the top just out a bit farther. You’ll see in my photos that the Honda CRV built in 45-degree angle now closely matches how I customized the eRapta. With the license plate screwed in tightly, these subtle angle changes do not show—the camera does not appear jut out more than before the bracket was bent. In any case, I strongly suggest that the good folks at eRapta go back to an adjustable bracket. WHAT ABOUT CUSTOMER SERVICE? As others have noted, utterly superb at eRAPTA. Commendable! I’ve had great communications with rapid replies. Although I have not tried to contact Boyo’s California office, I have read that others have been frustrated trying to reach them. WHAT IF THE CAMERA STOPS WORKING? Happily, eRAPTA gives a lifetime warranty but that does not mean it won’t be a pain replacing the camera. To ease the pain, I suggest having two on hand when you do the install. If one is bad, the other will likely be fine. Regarding wiring, most cameras of this type now have standard four pin connectors near the back of the camera. Try to do your install with an easy way to reach inside to grab the connector and pull it out should you need to change out the camera. Fortunately, it is highly unlikely you will need to redo the wiring all the way to the head unit. CONCLUSION: Hope this too long review has been of some small help. My impression is that eRatpa is always trying to improve its cameras and that’s admirable. Time for a more flexible bracket design but otherwise highly recommended.
J**D
Excellent Camera
This backup camera works fabulous! Surprisingly, the Picture quality is very good. Not too hard to install…pretty simple actually! I would recommend doing a little research on the install to make sure you know what you are going to need to do to properly route the wiring and power connection. I found a YouTube video for my specific vehicle which helped greatly. Overall, I would recommend this backup camera. Great Price for this great camera! Definitely Recommended!!!
S**C
Excels in low light conditions!
I just installed this camera to replace an Esky mini bullet camera. I've run the smaller mini on 3 different trailers for about the last 7 years. I've travelled thousands of miles to numerous race tracks and swear by these very affordable systems. They take so much stress out of driving a 24' enclosed trailer long distances. I've had to replace them about every 3 years because while they still have continued to work, the image quality diminishes over time. They get hazy, assuming due to eventual moisture penetration. I decided to pay about double the cost with the hope of better image quality and longer life. I just installed this new camera and while I cannot speak to it's longevity, I can say without a doubt that the image quality at night and dusk/dawn is FAR superior. Daytime color is much better but the smoothness of the image and detail seems slightly less accurate. Installation was fairly straightforward since I've done it a number of times. The wiring is plug and play with the older system but as others have mentioned, the supplied brackets are keyed to the rear of the camera housing making it not reversable and will take some creative bending to make it sit flush on the top edge of the trailer while still facing down at the proper angle. The photo in this review was taken at about 5am. As you can see through the windshield it was still quite dark out but the rear view camera appeared like daylight. I am so far very impressed with that aspect of this camera. I'll update this review at some point "down the road'.
E**9
Good camera, great customer service. Notes about install in 2013 CRV.
The camera works well. Customer service was excellent. When I mounted the bracket behind the license plate I could not bend the camera down enough to avoid having the lines floating slightly too high. The downward angle of the OEM camera is about 45 degrees. The best I could manage was 35 degrees before the camera pushed against the license plate. If I mount the bracket on the front of the plate it covers up the name of the state, so I can't do that. I will try enlarging the hole in the bracket to see if I can slide the camera up a bit higher. I decided to put in a new camera while replacing the head unit. It took quite a bit of effort to run the cable from the head unit to the rear (Honda 2013 (Gen 4) CR-V hatchback), but any wired camera will take the same effort. I removed various bits of interior trim and ran the RCA cable along the driver's side floor edge to the wire harness for the lights in the rear area. The power wire for the signal and reverse lights are both grey. I used a low voltage tester (Klein dual range) to pick out the reverse power wire and used a Posi-tap to connect. I had to lengthen the power wire from the camera to reach this location, so from here I ran an additional wire as I ran the RCA cable to the hatch. I lifted the trim along the inside left vertical of the hatch opening with a trim removal tool and was able to push the cable and wire underneath. I gently pulled down the edge of the headliner and was able to pick up the cable/wire. I then fished a pull wire through the seat belt unit in the ceiling and out the headliner. I then pulled the cable/wire through to the seat belt unit...but I did not pull the RCA connector all the way through, only the black part of the cable. I unclipped the flexible wire harness connecting the hatch and body. Then I fished a pull wire through the harness hole, through the hole in the 'inner' roof and through the seat belt unit into the cabin. I then pulled the cable/wire back out to the harness, and then I pulled the RCA connector through (so the RCA pin end came out last, to avoid snagging). Then I ran a stiff fish wire through the flexible wire harness towards the wire (left to right). Be patient if you do this...you don't want to snag and break one of the wires in the harness. You have to stretch the flexible harness as go. Then I pulled part of the RCA cable through (but not the connector, not yet). Once I had part of the wire through, I was able to pull the RCA connector though (again, pin last) . I put some soap on it first. Still, it was not easy, since I was worried about harming the existing wires. Then I fished a wire through the left side of the hatch and out the hole for the flexible wire harness, and repeated the process of pulling only the cable wire first, and the RCA connector last. That, at last, got the wires where I needed them. I detached the OEM camera and figured out I could drill a hole through the top if it (from the outside going in) for the camera connector. 5/16" diameter. That preserved the OEM camera in case I wanted to go back to it. [The connecting clip on the OEM camera broke so I secured it with silicone after I ran the camera cable from the outside to the inside.] You can only do this if your first loosen the OEM camera. Or, you can drill a hole through the hatch. At head unit side, I attached the red trigger wire to the reverse wire from the head unit . By the hatch, I grounded the black wire on an existing bolt and I connected the trigger wire with the power wires (one from camera, and the extra (longer) wire I had to run from the reverse light).
W**.
Good quality for price
I installed on a 2006 Toyota Tundra crew cab that already had a Pioneer dvd head unit when I bought the truck. The supplied signal wire was long enough for my vehicle with 4' extra. The camera and wires it came with were good quality and the picture is better than I expected for both day and night views at this price. Just in case this helps someone else, I ended up wiring differently than the instructions. I tapped the reverse light 12v+ behind the dash and connected it to my radio trigger wire and radio end of the camera signal wire, then grounded the camera connector on the trailer hitch. So instead of feeding 12v+ from camera to the radio, I went the other direction and the included signal wire was ample size to power the camera sufficiently.
***V
Not bad for the price
I've ordered similar style backup cameras in the past, but those came with their own separate viewing screens. This one on the other hand is a standalone backup camera that you connect to a compatible car with a built-in unit to see as you reverse. Installation, like most others have said already, is very simple and doesn't take too long even after following YouTube tutorials on the subject. There's an included link as well in the user manual from the company which is always a nice feature and shows how much the company cares to make sure you properly install the camera. Night vision is commendable and really helps for people like me who have issues with backing up and sometimes have trouble estimating the distance behind you adjust the car's rear view mirrors. In the instructions are even a comprehensive set of troubleshooting tips to make sure that you're doing this correctly and in the event that it's the manufacturer's problem they are promising to offer a replacement free of charge. Hopefully, we won't need to get this replaced anytime soon as it's holding up just fine so far.
N**A
No.
Good resolution, however Minus 5 stars as it stopped working after 2 weeks, and product is engineered to fail. Position of wire from back of camera forces severe angle of cable to clear supplied bracket, and cable rubs edge of license plate. This would eventually compromise the cable. Not notching or otherwise modifying a state issued plate to conform to sloppy engineering. Unable to use license plate frame because the cable exits the back of the camera well inside the edge of the license plate. Using a plate frame, even a thin one, would smash cable. After 2 weeks, no video signal to head unit, (Kenwood, as new as the camera.) Installation: Cable was run from camera to head unit encased in flexible plastic conduit, zip-tied to factory harness. (Up to the back side of the license plate, given the extreme angle of cable required to clear bracket and plate). No damage to cable sustained. All connections verified, no damage to either the camera or the cable, still no signal. Problem is either with cable or camera. Either way: Garbage. Look elsewhere.
E**C
Works fine in the day. Not troublesome to install. Useless at night. Don't buy from Amazon.
The first thing you need to know about this is that you do NOT want to mount it directly under the lights that illuminate your license plate. During the day, everything will be fine. At night, you won't be able to see a thing because of the glare from those lights. If you do 3d printing or are a bit crafty, you might be able to create or rig some kind of shade to keep the glare of that light out of the lens, but out of the box, it's useless at night when mounted in that position- which seems to be the intent. Definitely a design flaw that could have been easily addressed. Installation is pretty standard and if you've put in a car radio (or 'entertainment system' as they're known as these days) you shouldn't have any significant trouble. As always, do not buy from Amazon and vote with your money that medical discrimination, sexual harassment, wage theft, willful endangerment of associates and so much more is okay. If you want one of these things, look on ebay or a brick and mortar store.
H**Z
Emite una señal con BRISA...!!!
Lamentablemente ya esta instalada, se me dificulta regresarla pero emite una señal nada agradable casi siempre, mucha brisa y solamente aparece la señal nítida, muy clara como a mi me gusta pero lamentablemente no es muy frecuente. Los técnicos nunca pudieron resolver este caso, la estoy trabajando desde un equipo PIONNER y el problema persiste. Parecía una buena compra pero......!!!!
E**D
wont last
The picture is decent, however, it died on me, it lasted 1 summer and 1 winter died following spring. iv purchased about 4 different backup cameras from Amazon, and most last less than 12 months. Most of them will die (go black screen) during the winter months. This one did last the longest out of them all but still, what a PIA. And i have to agree the cord is in a terrible spot, its likely to pitch or chaff when installed.
Trustpilot
1 week ago
1 week ago