


ELEGOO Neptune 3 Pro FDM 3D Printer with Auto Bed Leveling, Dual-Gear Direct Extruder, Dual Lead Screw Drive, Removable Capacitive Screen, 8.85x8.85x11in Large Printing Size
Detalles
- BrandELEGOO
- MaterialAluminum
- ColorBlack
- Product Dimensions23"D x 9"W x
- Item Weight22 Pounds

Descripción
🚀 Elevate Your Printing Game with the Neptune 3 Pro!
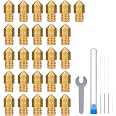
- EFFORTLESS SETUP - Get started in no time with pre-assembled components and a complete toolkit.
- STABILITY REDEFINED - Dual lead screw drive enhances accuracy and minimizes print deviations.
- PRECISION MEETS POWER - Experience whisper-quiet printing with advanced silent stepper motors.
- SMART LEVELING TECHNOLOGY - Auto bed leveling ensures flawless prints every time, adapting to your workspace.
- VERSATILE FILAMENT COMPATIBILITY - Print with confidence using PLA, TPU, PETG, and ABS materials.
The ELEGOO Neptune 3 Pro is a cutting-edge FDM 3D printer featuring a large printing size of 8.85x8.85x11 inches, auto bed leveling for precision, and a dual-gear direct extruder for enhanced filament feeding. With a noise level as low as 47-48dB, it offers a quieter printing experience. The printer is compatible with various materials and comes with a user-friendly setup, making it ideal for both beginners and experienced users.
Presupuesto
| Color | Black |
| Enclosure Material | Aluminum |
| Item Weight | 22 Pounds |
| Item Dimensions D x W x H | 23"D x 9"W x 19"H |
| Connectivity Technology | USB |
| Compatible Devices | Laptop, Personal Computer |
| Power Consumption | 360 Watts |
| Operating System | OS X 10.11 El Capitan, Linux, Windows 10 |
| Compatible Material | Polyethylene Terephthalate Glycol, Polylactic Acid, Acrylonitrile Butadiene Styrene, Thermoplastic Polyurethane |
| Printing Technology | FDM |
| File Format | STL |
| Voltage | 110 Volts |
Reseñas
A**R
WOW and Wow and wow
Three wows - TWO great and one not so greatAfter a few weeks deciding on a larger 3D printer for my molding use, I waited for the Elegoo Neptune 3 PLUS to be available in the USA. Of course it was Lunar New Year, so I thought I would be waiting for a few weeks. BUT HAHZAHH, Amazon had a few available January 23. I ordered it ASAP.Unit was delivered January 25 in good order. Happy New Year! Here's the detailed review.1. Item was packed very nicely. Snug and full foam kept parts in place thru shipping.2. Unpacking was easy, given the size of the bed and gantry, easier than I expected.All parts were as per manual. EACH part was in it's own CLEARLY labeled envelope - with corresponding numbers to match assembly instructions. This is much appreciated by me, especially if a particular screw is used by 3-4 different parts of assembly but are all placed in one bag. Less confusion, just more bags.3. Assembly is as per video on the micro-Sd card, manual and quick start guide. I DO suggest watching the JUSTVLAD and Uncle Jessy reviews (on Facebook) of the Elegoo Neptune 3 PLUS before you start assembly. They address real world assembly, not "expert (ELEGOO employees )" assembly. Of course tighten all bolts and screws properly. Never tighten one side fully and then start to assemble the other - that can cause big trouble.4. Once fully assembled, BEFORE you power up the unit, MAKE sure that all connections are good AND check cable routing - especially the mail ribbon cable to the print head. It HAS to be placed a certain way to clear the rear brace and NOT rub against it.5. Make sure the bed is NOT wobbling at all BUT not so tight that it does not roll smoothly. This is a large bed 320x320mm so any looseness will mess up everything.THIS WAS way more DIFFICULT than it needed to be. To adjust the eccentric nuts below the bed, the supplied wrench was JUST barely long enough. On the left side it had to fit BETWEEN a leveling screw and the bed to get to the eccentric nut. What a pain. A 3 inch longer wrench would have made this much easier. All my other wrenches were too thick to slide between this tight space. After a couple of hours (no joke), I finally got the bed so the adjustment screws could work to get an OK level to set up the 7 point manual leveling. As per the manual you MUST do this BEFORE the auto leveling - so the unit has a good range to work with when doing the auto level. You may have to adjust your Z offset again before the auto level also.5. Once the auto leveling is done you're almost ready to go.I suggest NOT using the sample filament that came with the machine - much too little to get a series of test prints done. The item on the test print - Buddha - is cute BUT it's the ELEGOO "perfectly" sliced sample. I think a group of simple test prints - available in the CURA set that comes with the printer can get you a great/Accurate value to you future prints. I did three calibration cubes with increasing accuracy, changing a couple of parameters each time. The last one was (on a 20MM cube) 20.01x20.00x20.01. can't do better than that. Temp and stringing tests should also be done before any project.Get the values you want and then get to it. MORE Benchies.Pluses - two WOWS1. Feature set/construction - Heavy mostly metal build. Big print bed with PEI sheet. Great for print adhesion and removal. A Glass bed this big would be tough to handle easily anyway.Touch screen - big enough AND logically laid out with NOT to many sub set screens to wade thru. Also can be moved as you check out printer. Large deep feet - air flow around and below unit is good.Very stable unit with the braces making it totally solid, no wiggle or shaking.Direct drive extruder with run out sensor NOT on the extruder (less weight). Ribbon cable attachments - mostly just ONE main cable with smaller wiring off of it.LED lights on top of Gantry illuminate bed TOO well. They can be dimmed which is great2. Operation WOW #2 - easy to follow sequence on touch screen with 4 main sections Print, Prepare, Settings, Level. Each with good subsets of routines to follow.Spool holder on top with run out sensor there.Uses a micro SD card or USB cable for input to printer. See below my thoughts re. micro SD.Tools that come with unit are OK. Scrapper is plastic , Allen keys OK, a couple of small screw drivers AND a tube of glue stick. Extra nozzles and some PTFE tube. Some zip ties to work out cable management. Printer size makes the cables very long. PEI sheet does need some maintenance - cleaning, etc. BUT a glass bed this big would be a beast to work with. I have not seen a PEI sheet of this exact size available yet as a future replacement.Aesthetically unit looks great. Braces on rear are NOT same color as bed, base of unit - an off blue color that's very appealing.Sound when in use is not bad BUT not so quiet as other printer I have. Cooling Fan is OK BUT at high rate it is kind of LOUD. Fan IN the unit was load when I first turned it on, as I've used it it has gotten quieter - lubrication worked into it?3. little wow (not so impressive)Set up of bed before leveling was difficult for no real reason. Just needed a slightly longer wrench to get to eccentric nuts more easily.Manual does not have great English usage. uses phrases that are grammatically correct "eccentric isolation column" BUT NOT common usage. JUST SAY "eccentric nut". Some spelling errors too. Sorry - channeling an old English teacher from the last century (SIGH).Cable management not so great . Mostly due to size of print area BUT Use of SINGLE main ribbon cable for almost all attachments to bed means that is one small connection fails, entire MAIN cable must be replaced. "ONE Cable to rule them all" - depends on a GREAT cable. The main cable MUST be routed between the print head and base carefully to avoid the rear braces. I am going to figure out a way to support the cable (maybe from above or the side of the brace) so it does NOT just flop around - especially As a tall object is printed. To reduce strain on the ONLY cable.Touch screen is NOT sensitive. I am used to using a stylus - keeps the screen cleaner. Must use my old man fingers to get response.Unit could use a clip or two on the back of the bed to line up the PEI sheet better when it's replaced after cleaning, etc.Main (0ld man) GRIPE: Using a MICRO SD card for input - ubiquitous cards are easy to get BUT TINY to use. Card that came with the unit was IFFY at best. A print failed mid way due to a communication error . I had a read file problem with it the 3rd day in. A good thing I made a copy of the original card right away. Another printer I have uses USB, Full sized SD and USB cable for file use (Mingda Magician). Options make it easier IF there is a failure of card (or internal reader).Things to add:1. LONGER wrench2. A sound when the print is DONE. Mingda has an (annoying) beep when print finishes. Reminds me to "look over there damnit."3. ALL Metal hot end - get rid of PTFE tube4. A proofreader with command of English to fix language and spelling errors in documents.5. MOST IMPORTANTLY Use of a full sized Sd card and ADD a USB port. The MicroSD card does not allow SUB directories for printing files. All files have to be loaded in the root directory to print. I like to have "toys", "Hardware", etc. directories so I can find files easily organize them.I know there is a lot of carping above BUT so far the ELEGOO NEPTUNE 3 PLUS has been a joy to deal with, in spite of my complaints. FIVE Stars for ELEGOO Neptune 3 PLUS.
T**T
The best machine, with mindful use
My new HP copier died. This machine did not.This elegoo printer is the best affordable and high quality intro to 3D printing. The parts provided, tools, and starter filament are all fantastic.I am another one to say that it did work straight out of the box and producing high-quality prints though results may vary. Because of the nature of the printing experience, it’s very important to understand fundamentals of how the machine works, and make sure certain things are adjusted properly and certain things are tightened. Regular maintenance of the machine would be recommend.I’ll begin now with faults here which are related to the setup. The setup of the machine and use is not fully detailed in the manual. There are several things to pay attention to, that’s not in the manual. For instance, they don’t tell you that the build plate is magnetized onto the machine and you remove it after a print and the bed cools, then you flex the plate to get your print job off. Took me a good moment to find this out.Other things left out are related to setup and maintenance. Do research on the machine before you get it, and you’re certainly more likely to have a good printing experience.It also does have a couple software faults maybe to keep aware of. I had a print job fail to resume after pressing pausing it. And I’m not sure if it had anything to do with how my model gcode was written by the slicer.Also keep aware, be sure to remove your model after a print. Further actions you might take after you return to the home screen are not aware of whether any material is still on the build plate. So if you’re not careful, you could run the print head into your build and destroy things including the printer.Furthermore, the machine is not WiFi connected and I thought it was supposed to be. I’ll have to check on that later, however it still does have an Ethernet jack.Now onto print fails. Running the printer at high speed is nice, but it can introduce problems in both the machine and prints. Be sure to upgrade the machine maybe if you want super high speed like advertised and use a high speed filament. The servo motors can do it though. My other fail is possibly from a bad slice from Cura slicer. Cura provided a warning about the STL I was printing, so I’m assuming that the print issue there was not related to the printer itself.Lastly, the auto bed leveling is working well. It took time because some of it is still manual. Again, experience may vary and do your research.Overall, as a first time user, I’m extremely satisfied because I’m a user that understands nothing is perfect and overall, elegoo has put out a noteworthy milestone in 3D printing.I’ve also attached a photo of my 3D benchy for reference of print quality
Preguntas comunes
Trustpilot
Hace 3 semanas
Hace 1 mes
Obtén la aplicación
