Descargar la aplicación


Servicios al cliente
Sobre nosotros
Copyright © 2025 Desertcart Holdings Limited
Descargar la aplicación
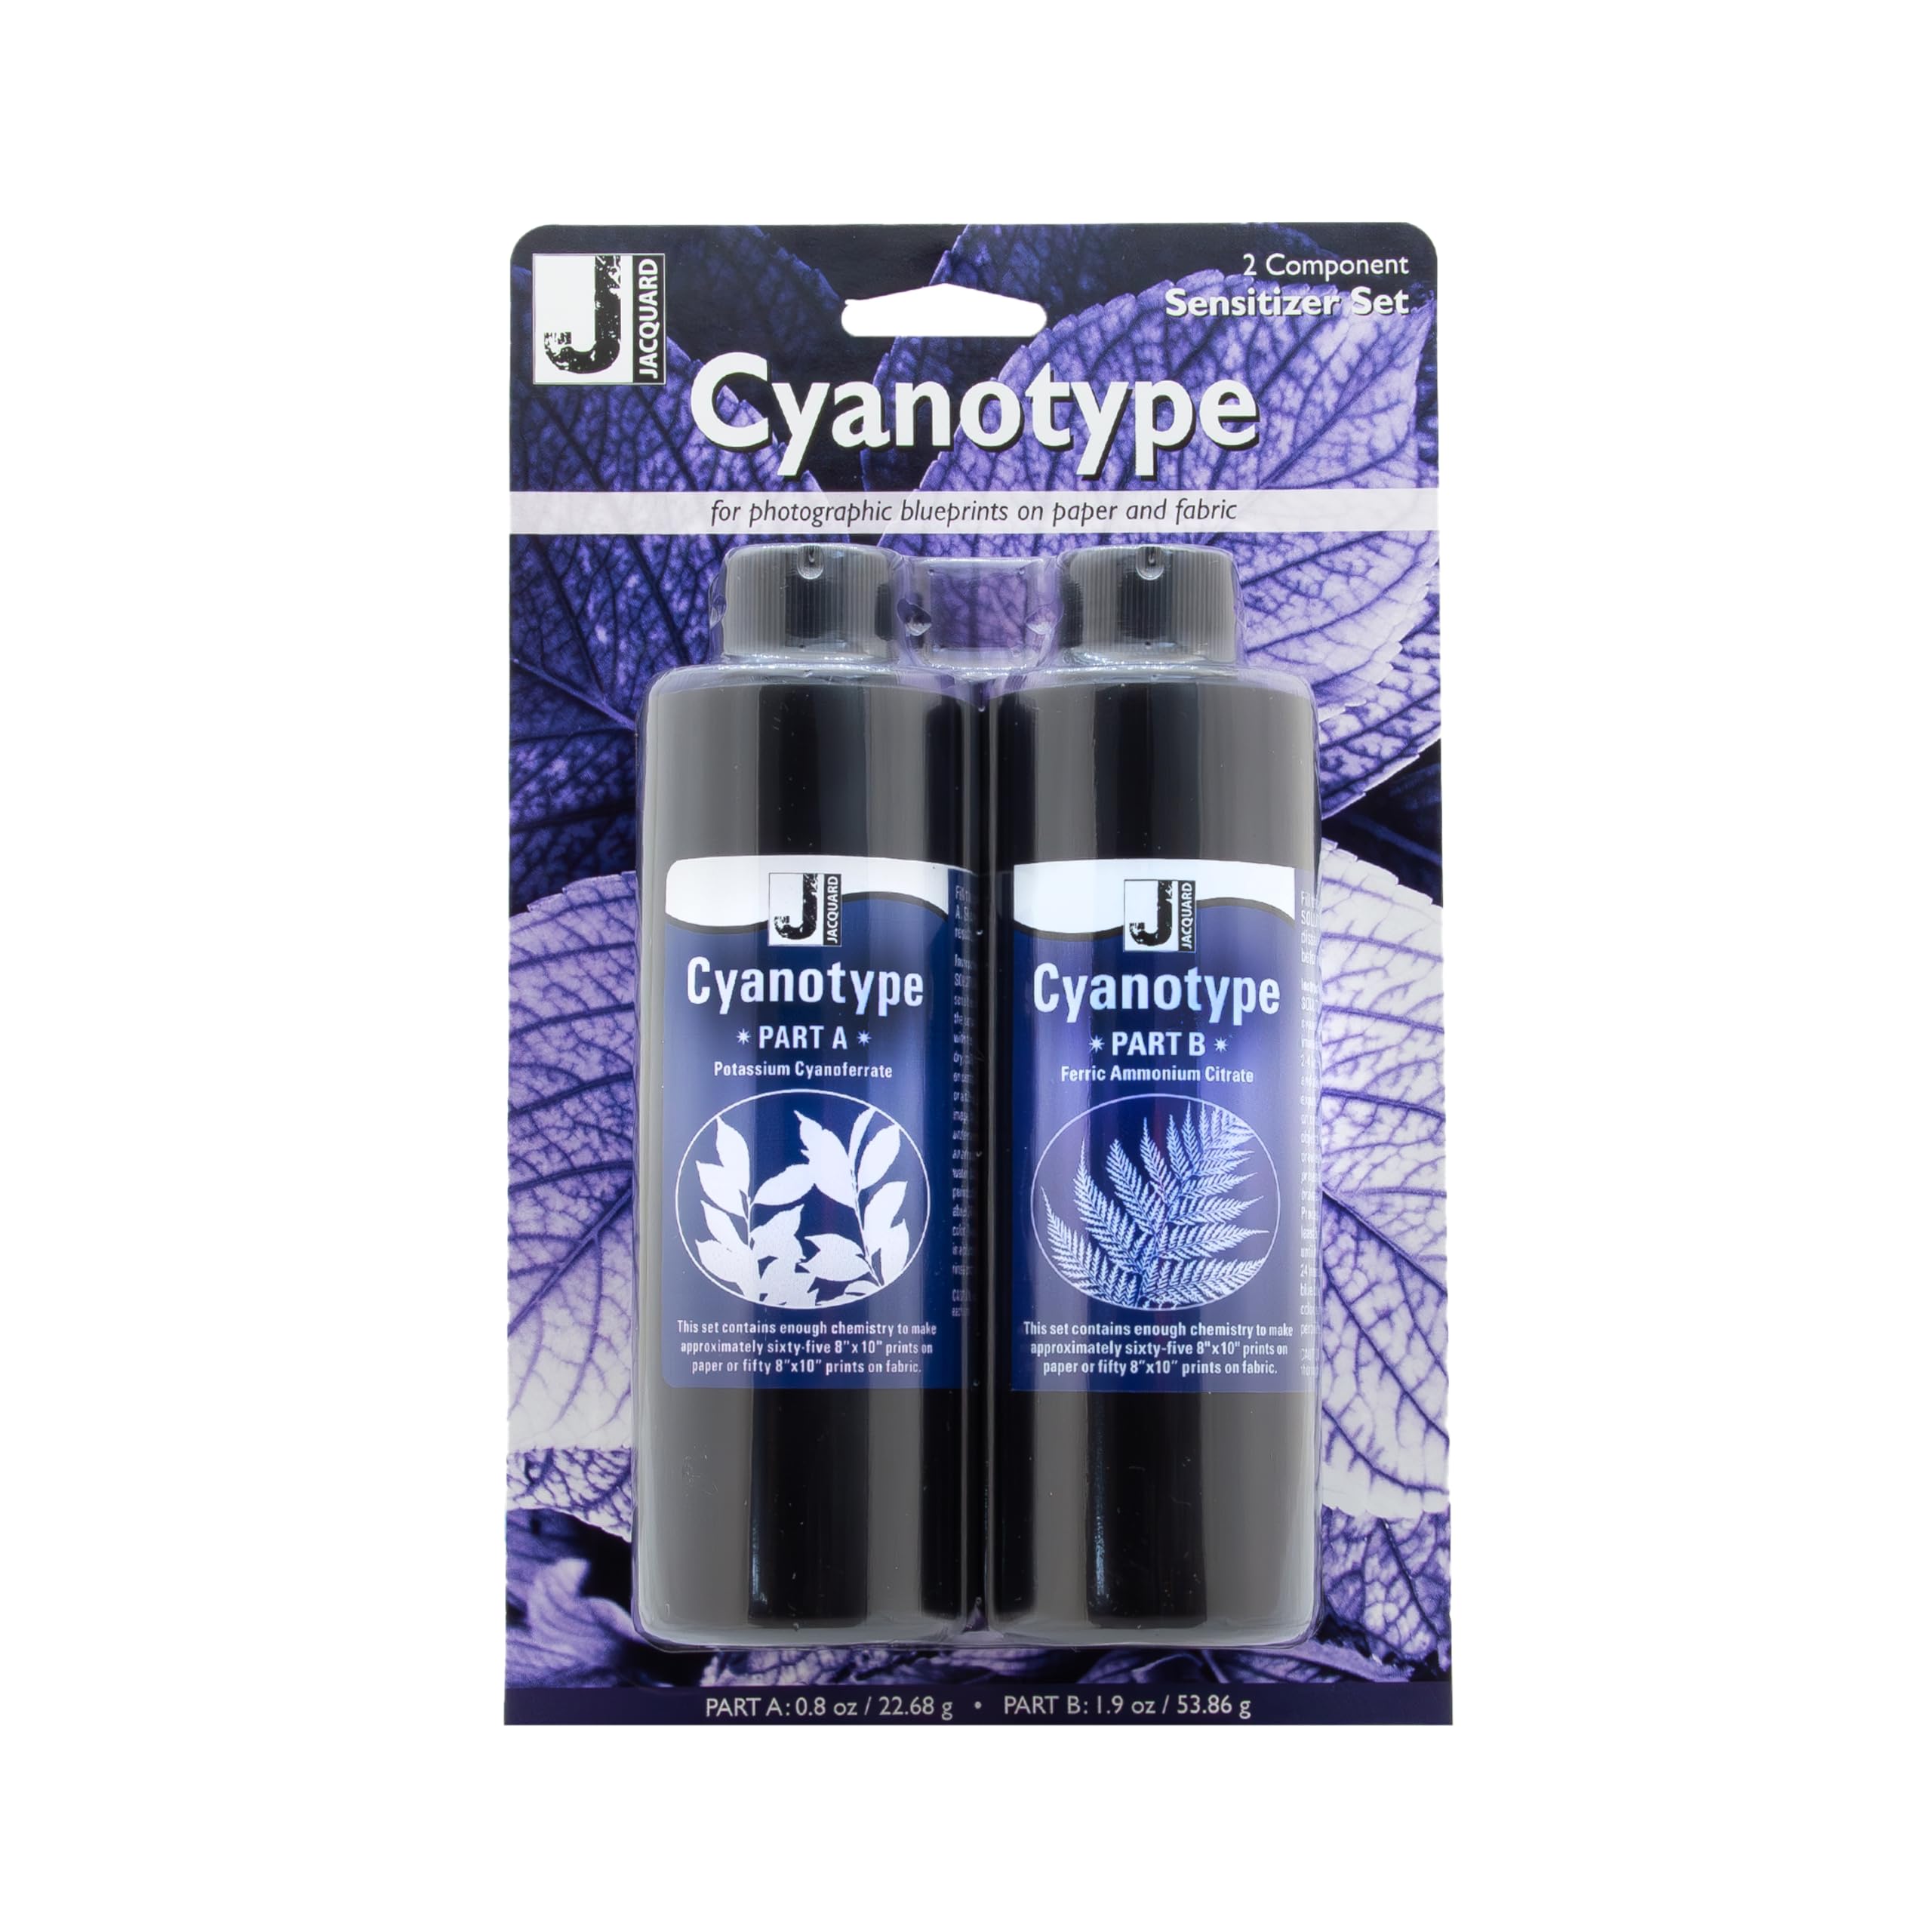
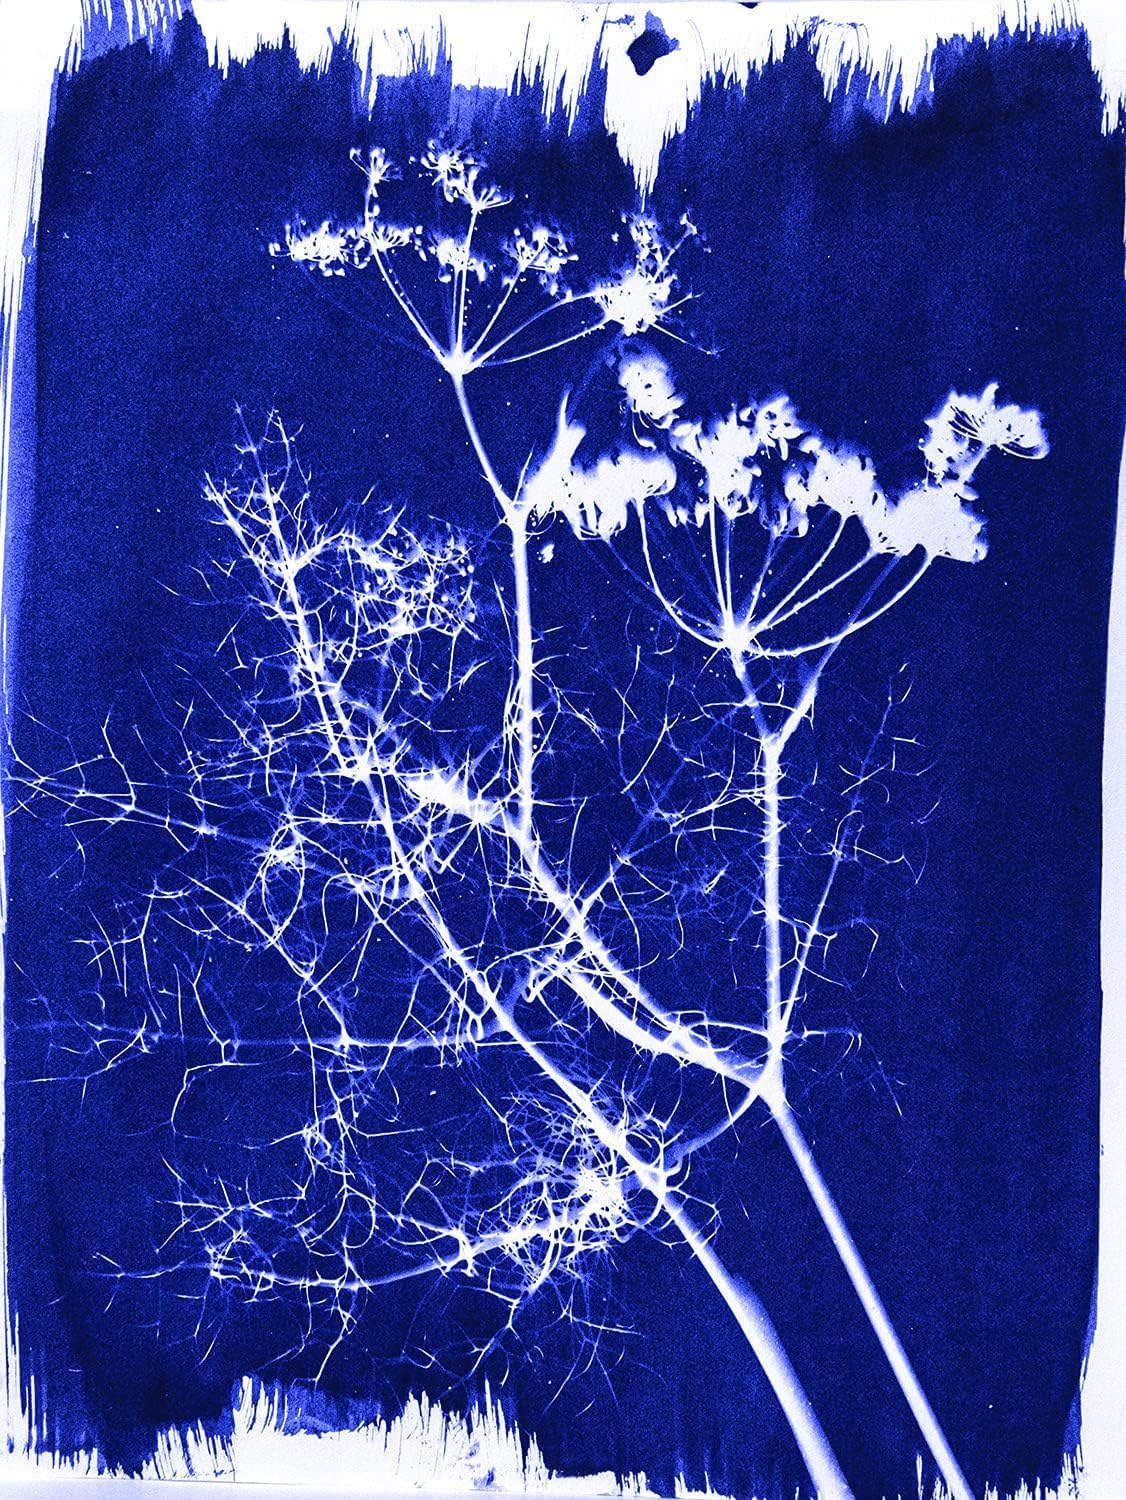

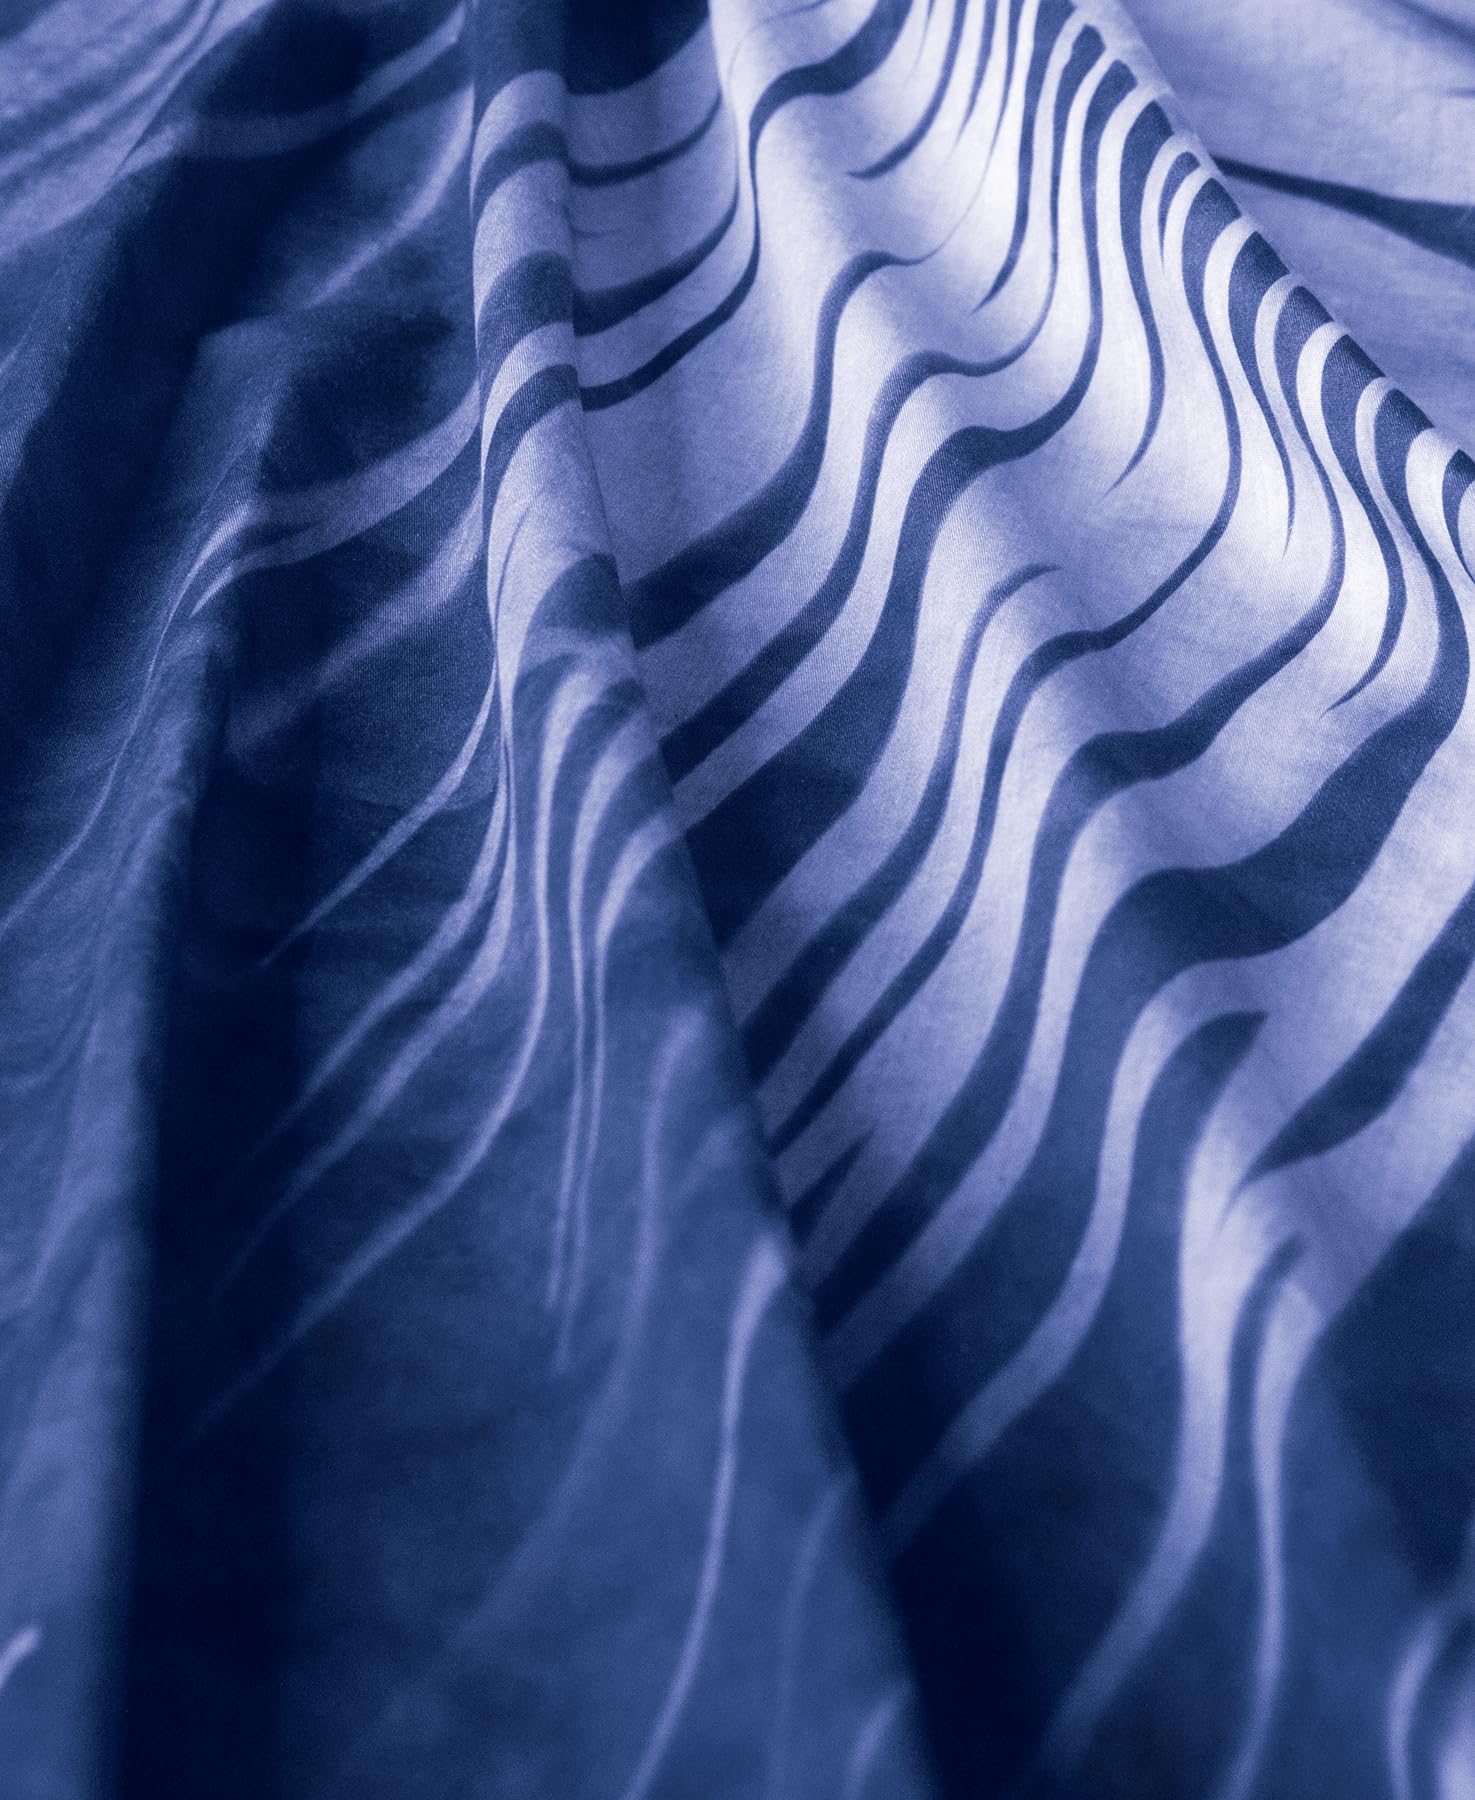


☀️ Capture your creativity in timeless blue—where vintage meets visionary!
The Jacquard Cyanotype Sensitizer Set is a 2-piece solution kit designed for creating rich, fade-resistant Prussian blue photographic prints on paper and fabric using sunlight. Rooted in the historic 1842 cyanotype process, it enables artists, photographers, and creatives to produce detailed sun-exposed blueprints and photograms with ease and versatility. Compact and user-friendly, this set invites innovative expression through a classic, eco-friendly technique.
| ASIN | B010MN312S |
| ASIN | B010MN312S |
| Batteries | AA batteries required. |
| Batteries | AA batteries required. |
| Batteries Included? | No |
| Batteries Required? | No |
| Battery Cell Type | Alkaline |
| Color | Clear with Black components |
| Coverage | Full |
| Customer Reviews | 4.6 4.6 out of 5 stars (2,688) |
| Customer reviews | 4.6 4.6 out of 5 stars (2,688) |
| Date First Available | 8 July 2015 |
| Date First Available | 8 July 2015 |
| Finish | Gloss |
| Included components | solution bottles (2); instructions |
| Is Discontinued By Manufacturer | No |
| Item Package Quantity | 1 |
| Item Weight | 141 g |
| Item model number | F-JCY1100 |
| Item model number | F-JCY1100 |
| Manufacturer | JACQUARD |
| Manufacturer | JACQUARD |
| Material | Jacquard |
| Number Of Pieces | 2 |
| Part number | F-JCY1100 |
| Product Dimensions | 24.13 x 14.48 x 5.08 cm; 140.61 g |
| Product Dimensions | 24.13 x 14.48 x 5.08 cm; 140.61 g |
| Size | 2 Piece Assortment |
| Special Features | Fade Resistant |
| Specific uses | Interior |
K**D
Just what I really want
I am so excited to try it
P**O
Haven't tried it yet, I hope it works!
A**O
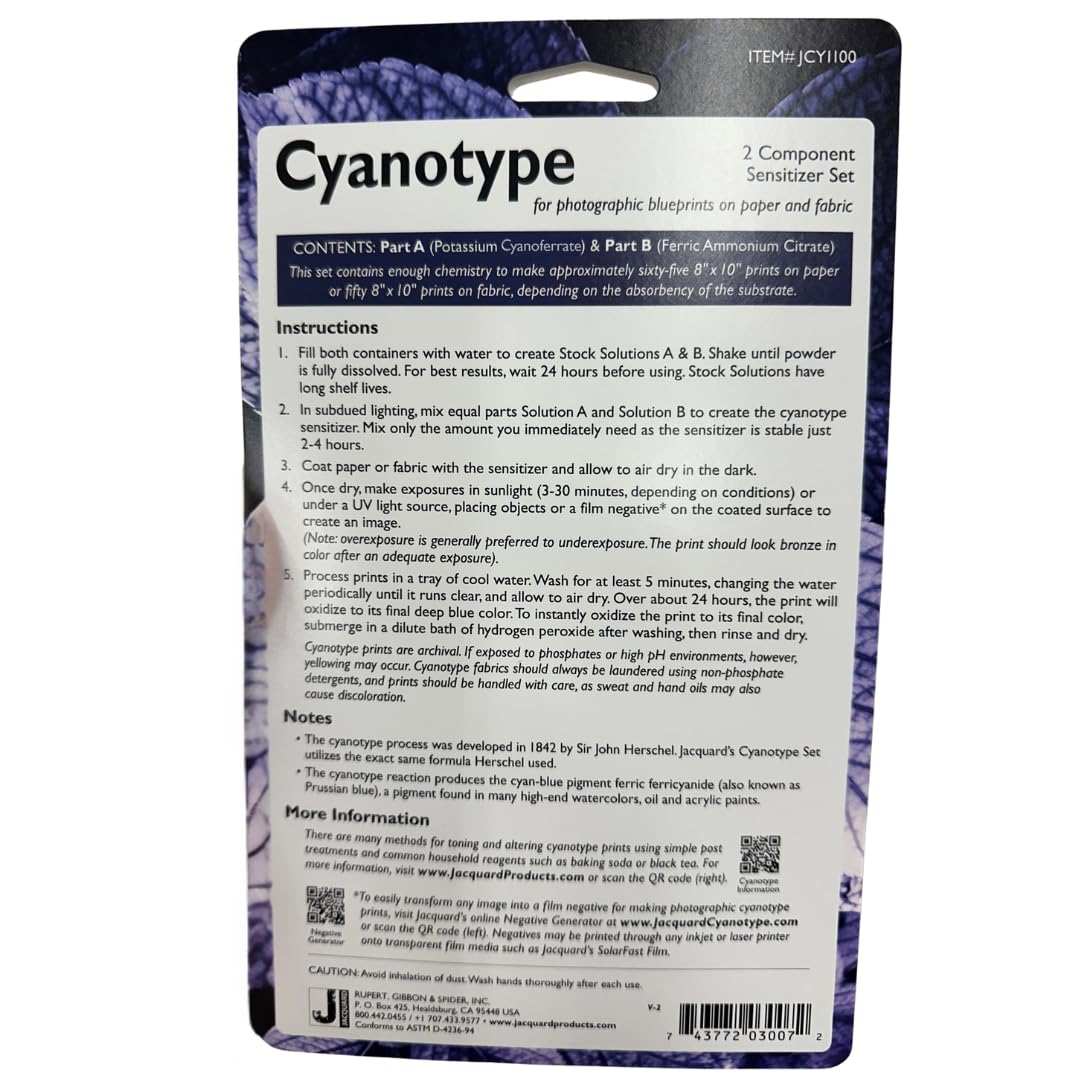
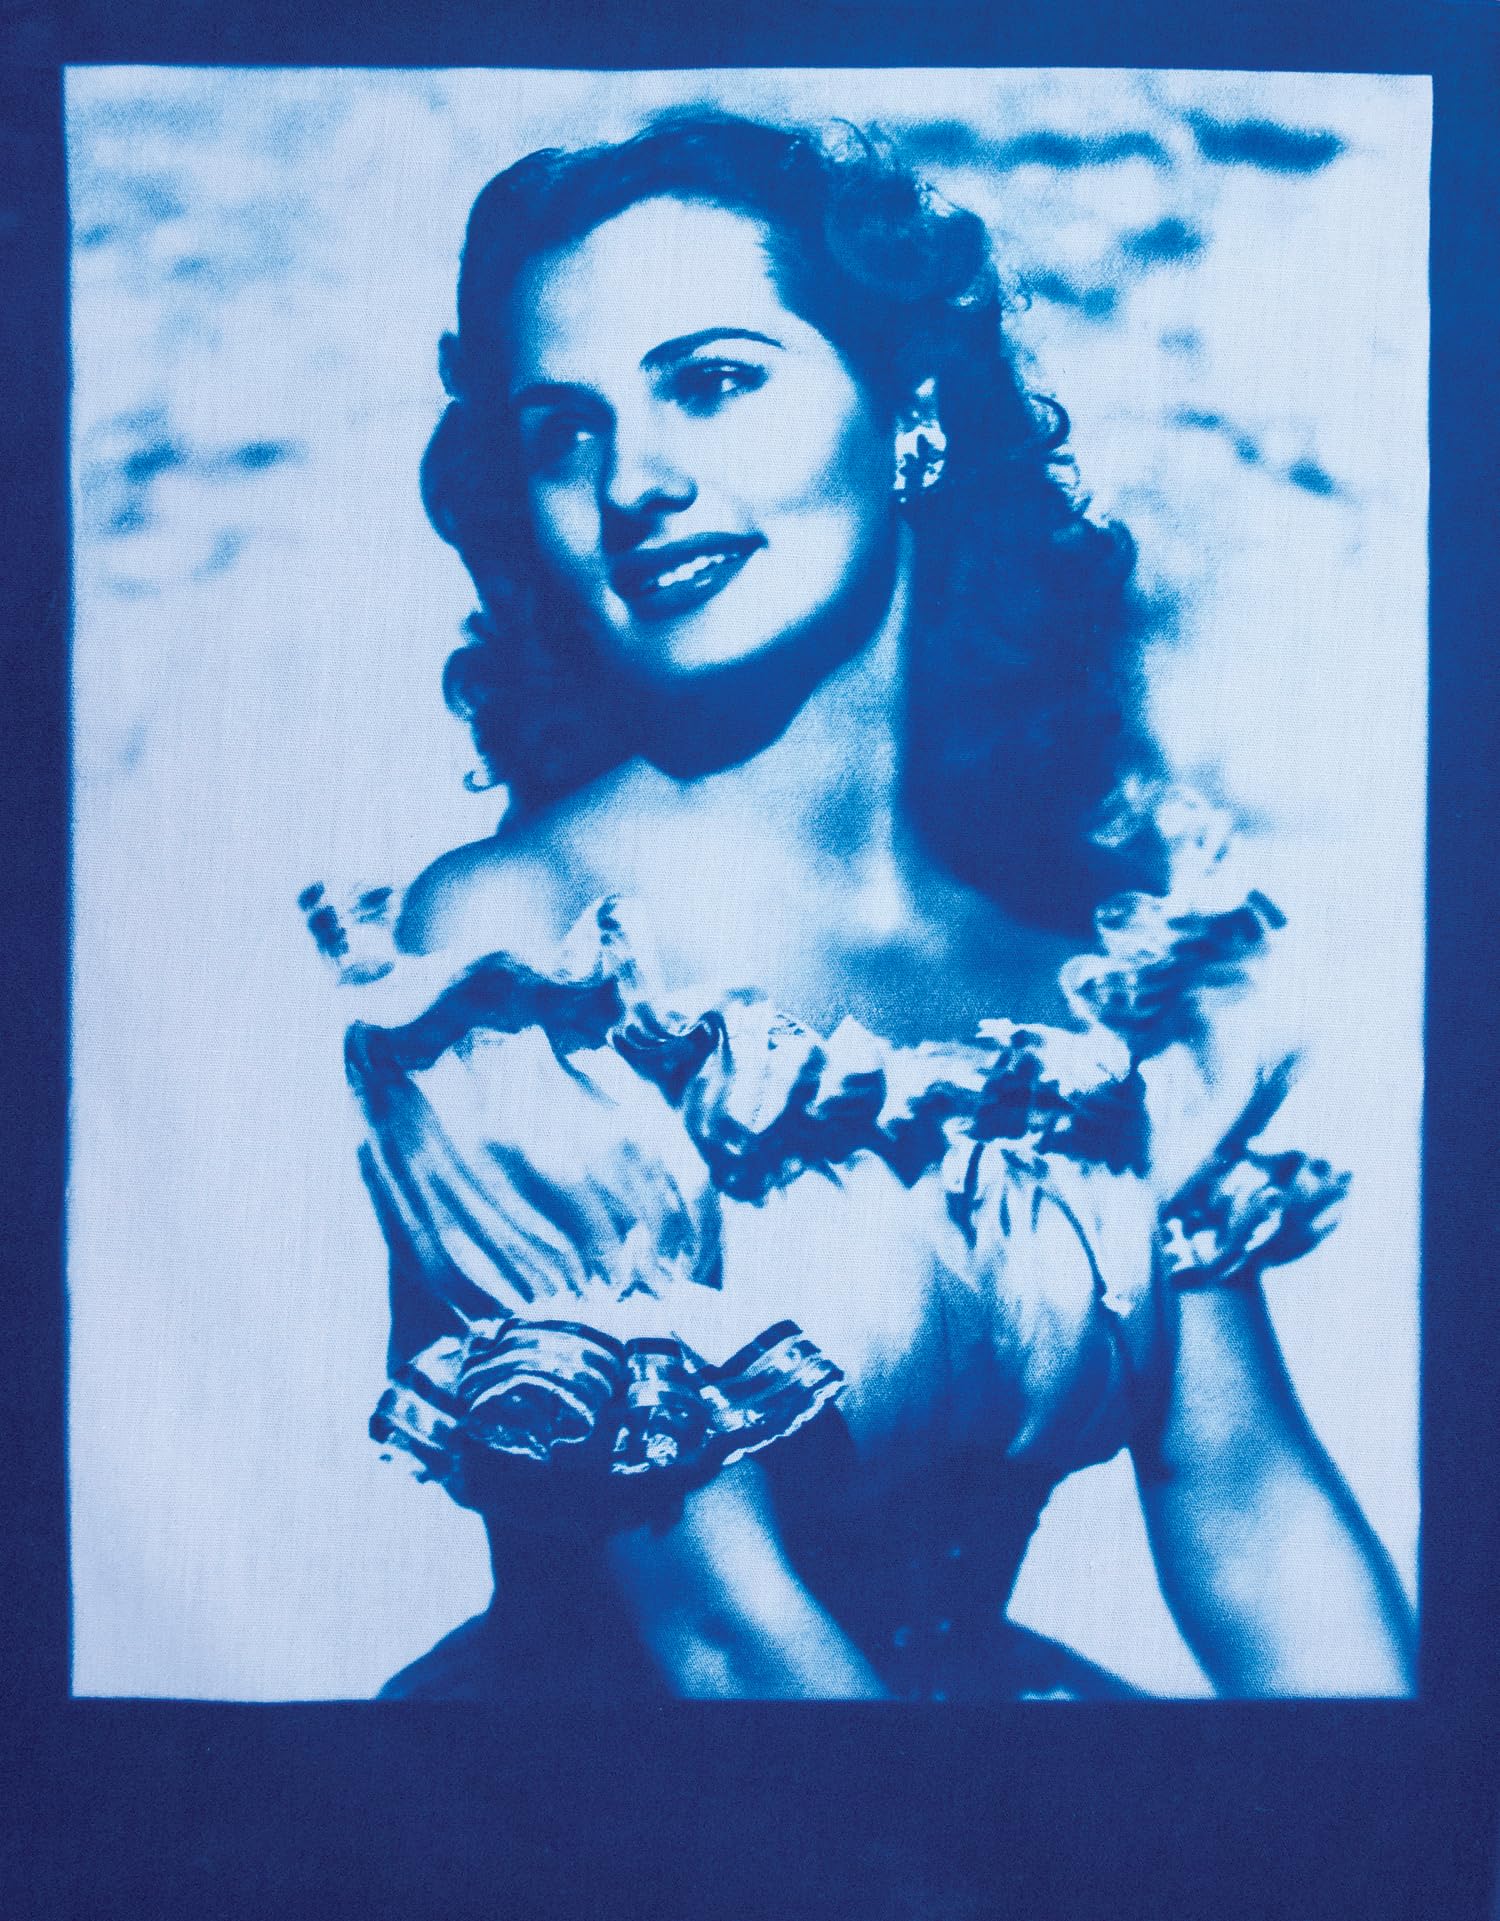
El Jacquard Cyanotype Sensitizer Set es un kit completo diseñado para aficionados y profesionales de la fotografía alternativa que buscan explorar el proceso de cianotipia, un método de impresión fotográfica histórico que produce imágenes en tonos azules distintivos. Este set proporciona todo lo necesario para comenzar a crear cianotipos en casa, permitiendo la experimentación y la creación de arte único y personalizado. Contenido del Kit Soluciones de Sensibilización: El kit incluye dos soluciones esenciales para la preparación del papel: el solucionador de citrato de hierro y el solucionador de ferricianuro de potasio. Estas soluciones se combinan para sensibilizar el papel, permitiéndole reaccionar a la luz ultravioleta y formar imágenes durante el proceso de exposición. Instrucciones Detalladas: Se proporciona un manual detallado con instrucciones paso a paso sobre cómo preparar las soluciones, aplicar la mezcla al papel y realizar la exposición. Estas instrucciones son muy útiles tanto para principiantes como para aquellos con algo de experiencia en el proceso. Papel para Cianotipia: Aunque el kit no siempre incluye papel para cianotipia, suele recomendarse usar papel de acuarela o papel fotográfico especial para obtener los mejores resultados. La sensibilidad de estos papeles a las soluciones del kit garantiza impresiones claras y de alta calidad. Proceso y Aplicaciones Preparación del Papel: El proceso comienza con la aplicación de las soluciones de sensibilización sobre el papel. Una vez aplicado y seco, el papel está listo para recibir el negativo o los objetos que se desean imprimir. Exposición a la Luz UV: El papel sensibilizado se expone a la luz ultravioleta. Esto puede hacerse al sol o utilizando una fuente de luz UV específica. La exposición crea una imagen en tonos azules, que luego se revela en un baño de agua. Revelado: Después de la exposición, el papel se sumerge en agua para revelar la imagen. Este proceso elimina las soluciones no expuestas y deja una impresión de cianotipo vívida y duradera. Pros Kit Completo: Incluye todas las soluciones necesarias para comenzar con la cianotipia, facilitando el proceso de creación. Instrucciones Claras: El manual detallado asegura que incluso los principiantes puedan seguir el proceso y obtener buenos resultados. Exploración Creativa: Ideal para artistas y fotógrafos que buscan experimentar con técnicas fotográficas tradicionales y crear impresiones únicas. Calidad del Resultado: Produce imágenes en tonos azules distintivos y duraderos, perfectas para proyectos artísticos o decorativos. Contras No Incluye Papel: El kit no siempre incluye papel para cianotipia, lo que requiere que los usuarios adquieran su propio papel especial. Proceso Laborioso: La cianotipia puede ser un proceso que requiere tiempo y paciencia, lo que podría no ser ideal para quienes buscan resultados rápidos. Sensibilidad a la Luz: El proceso requiere un entorno adecuado para la exposición y el revelado, lo que puede ser un desafío si no se dispone de un espacio adecuado. Conclusión El Jacquard Cyanotype Sensitizer Set es una excelente opción para quienes desean explorar la cianotipia, una técnica fotográfica histórica que produce impresiones en tonos azules únicos. Con su kit completo y las instrucciones detalladas, es accesible tanto para principiantes como para fotógrafos experimentados. Aunque la falta de papel y el proceso laborioso pueden ser considerados inconvenientes menores, la posibilidad de crear arte personalizado y la calidad de los resultados hacen que este kit sea una inversión valiosa para los entusiastas del arte fotográfico alternativo. La Jacquard Cyanotype Sensitizer Set es muy recomendable para aquellas personas que quieran realizar un cianotipo de su imagen sobre un papel o cualquier otro objeto. Basta con seguir las instrucciones y, en caso de duda, consultar algún pequeño tutorial y podrás llevar a cabo el proceso de cianotipia de manera satisfactoria. Lo usé para un trabajo y los resultados fueron óptimos, me salió a la primera y me guardé de recuerdo el cuadro. Recomiendo altamente este kit si estás interesado en hacer cianotipia o si es que te lo han pedido para un trabajo, yo tuve mis dudas para comprarlo porque había varios y la verdad muy bien.
M**Z
I've used Jacquard’s cyanotype chemicals as an artist and workshop facilitator for over three years, both for my artwork and in the cyanotype workshops I teach. It’s a fantastic product—easy to use, safe, long-lasting when stored properly, and works beautifully on various substrates and fabrics. The powder form makes it super convenient—add water, mix, and you're ready to go. Highly recommend for artists, educators, and anyone exploring cyanotype!
L**M
Title: Unleash Your Creativity with Jacquard Cyanotype Sensitizer Set! ⭐️⭐️⭐️⭐️⭐️ The Jacquard Cyanotype Sensitizer Set has opened up a world of creative possibilities for me. As a photography enthusiast, this kit has allowed me to explore the fascinating realm of cyanotype printing. The set comes with clear instructions, making the process straightforward even for beginners. The sensitizer solution produces vibrant and rich blue hues, adding a unique touch to my prints. The versatility of this set is impressive; I've used it on various surfaces, from paper to fabric, and the results have been consistently stunning. What I appreciate most is the reliability of Jacquard products, and this set is no exception. The sensitizer formula is easy to mix, providing consistent results with each use. If you're looking to add an artistic flair to your prints or dive into alternative photography processes, the Jacquard Cyanotype Sensitizer Set is an excellent choice. Highly recommended for both seasoned artists and newcomers alike!
A**S
I bought some cheap multimedia/watercolor paper and used a brush to coat. I've used it to treat a couple hundred 8.5 x 11 sheets and I still have some left in the bottles. I wish I had tracked this better, but I think this will coat 300-500 8.5 x 11 sheets (way more than the bottle indicates). The results are great: very consistent and vivid. After prepping (about two hours of work) I made prints with 40 kindergartners and 8 adults in about 30 minutes, and everyone was pleased with the results. 1) I added water per instructions and fully dissolved the solids inside the bottles. I made a test example immediately after this and it worked fine, but the instructions advise to wait a day. I continued using the bottles for about a month and kept getting good results. 2) I covered a large work area in cheap plastic drop cloth. I was working with the blinds down, which left it bright enough to see. The less natural (UV) light, the better. However, I was able to work with regular indoor lights on while I did the coating and it seemed to work fine. 3) I combined a small amount of the solutions per the instructions. I used a digital scale to get equal amounts in a paper cup or bowl and used immediately. I would recommend mixing a tablespoon of each at first. This should coat 10-20 sheets of paper pretty easily, or perhaps a 5x5 area of cotton fabric. Mix only what you need. I didn't test how long the mixed solution could be left, but I think this should be done same-day. 4) Using a 3 inch foam brush, I coated several sheets of cheap 8.5x11 mixed-media/watercolor paper. It's about $5/60 sheets at hobby stores. I didn't price it online. The important thing is to completely cover the pages, but it doesn't need to be heavy or dripping. 5) I left the lights off while the paper dried for most of an afternoon. 6) I cut the paper down and stored it in manilla envelopes with a couple of extra sheets of construction paper to block out light. I don't know how long it will keep this way, but it works fine for at least 4 weeks. 7) I used glass from the hardware store and cut it ($8 tool) and taped the edges with duct tape. A 10x12 sheet of glass doesn't require cutting and costs about $5. A much bigger sheet can be cut into quarter-sheet sized pieces for about $1 each. Your willingness to work with glass and the size you want to use will determine the cost. The glass serves two important purposes: a) It keeps everything from blowing away. Even a little shifting will ruin the exposure. b) It keeps the objects flat against the cyano paper, giving a nice sharp silhouette and delicate details. Think of the shadow your hand makes when it is directly next to the ground or a wall, and then how fuzzy that shadow gets as you move your hand farther away. That sharpness of focus is the principle at work here. 8) I did this with kids using 4.25x5.5 quarter sheets, so I will describe that process. I folded a piece of heavy, dark paper and placed the cyano sheet inside and put masking tape on the outside. We had no trouble working briefly in the shade. However, these sheets can't be left outside in the shade for more than a few minutes or they will start to develop. Keep them in something like a folder before exposing. Kids wrote their names on the back (white) of the cyano sheet and the masking tape of the folder. 9) Kids collected their nature objects and opened their folder in the shade to arrange them on their cyano sheet. Kids were given a plate of glass to make a "sandwich:" cyano paper on bottom, nature objects next, glass on top, everything in the folder held careful and flat. 10) Once everything was arranged, the folder was moved to a sunny area and opened up to expose the cyano paper. I would stand with my shadow over it at first while I made any necessary quick adjustments and then moved everyone away for the exposure time. Bumping into the paper could be disastrous. 11) The paper can be exposed for about 3.5 minutes on a sunny day. On cotton cloth, 6 minutes seemed like a better length of time for photographic exposures. Using a black light inside, it needs to be just a few feet away for 10-15 minutes (if it washes out later, it was underexposed). 12) Once the time was up, we quickly stuck the papers back in the folder to stop the exposure and be ready to wash. 13) I used vinyl gloves when rinsing large projects, but I didn't get any stains just rinsing single sheets by hand. This should be done in the shade/artificial light, not in the sun. My advice is to get a paper plate or disposable baking pan filled with water and let the sheet soak and change the water 4-6 times over 2-3 minutes. For a large group project, create a line of 6 pans and run sheets through the pans 3 at a time for about 30 seconds each, shuffling them down the line in small batches. You can rinse 40 sheets in less than 10 minutes this way. Near the end of the washing process, use a small amount (a drop on a plate of water or a few drops in a pan) of hydrogen peroxide and watch the picture turn dark blue. Then rinse the peroxide water out in the final wash. The end result should be fairly stark deep blue and bright white. If the white looks ivory or yellow, it can probably be soaked/rinsed a little longer. If the blue is faded, it probably should have been exposed longer. I've also done this on smoothly sanded wood and left to soak/rinse for 10-20 minutes with good results. 14) The best way to dry the paper is hanging from a string with clothespins or letting as much water as possible drip off and then lying flat on a paper towel. DO NOT place a paper towel on top of the cyano paper. The color tends to leach/bleach during drying this way. I left mine in the sun to dry without ill effects.
Trustpilot
Hace 2 meses
Hace 5 días